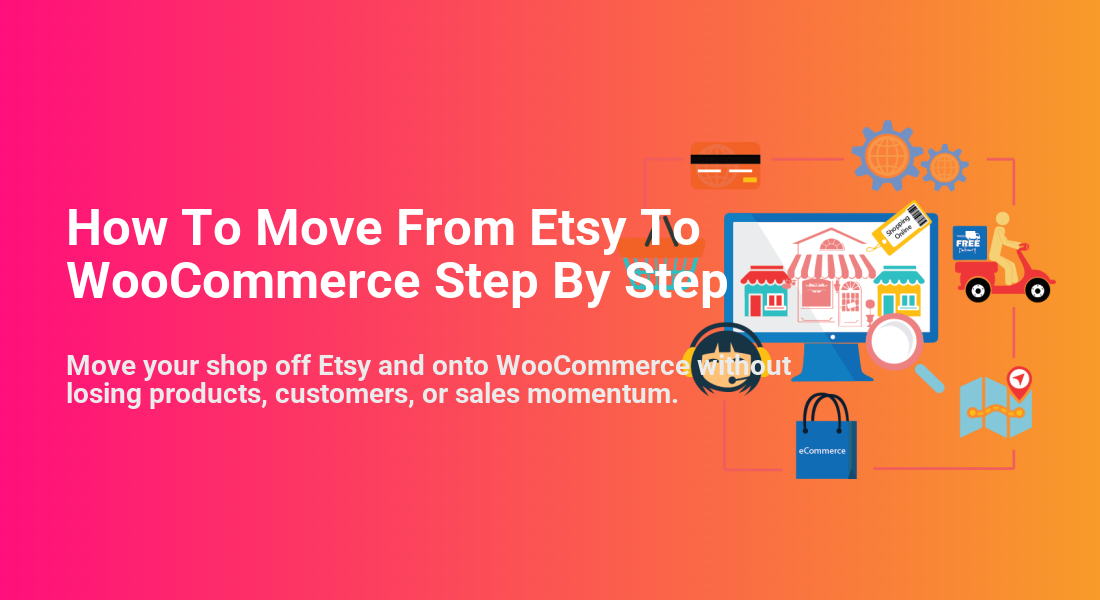
How To Move From Etsy To WooCommerce Step By Step
Move your shop off Etsy and onto WooCommerce without losing products, customers, or sales momentum.
Running your shop on Etsy is convenient, but the fees, algorithm changes, and limited control can start to squeeze your profits. Moving to SEO and UX, and where you will see it in daily work.”>WooCommerce on your own WordPress site gives you full ownership of your brand, customer data, and checkout experience – but only if you migrate correctly.
In this guide, you’ll walk through a complete, step-by-step process to move from Etsy to WooCommerce: auditing your current listings, preparing your WordPress and WooCommerce setup, exporting data from Etsy, importing it into WooCommerce, and finally testing and launching your new store.
If you’re still weighing your options beyond WooCommerce, you can compare other platforms in our breakdown of best Etsy alternatives with lower fees, but this tutorial focuses specifically on the Etsy → WooCommerce migration path.
Prerequisites
Before you start moving data, make sure your technical foundations are ready. Migrating on top of a half-configured WordPress install is a recipe for confusion and rework.
- Domain & hosting: You have a registered domain and a WordPress-ready hosting plan.
- WordPress installed: WordPress is installed and you can log into
/wp-admin/as an administrator. - WooCommerce installed & activated: The WooCommerce plugin is installed, activated, and visible in your dashboard menu.
- Access to your Etsy shop: You can log into Etsy with permissions to access Shop Manager and download data.
- Basic spreadsheet tool: Excel, Google Sheets, or similar to review and clean the CSV files from Etsy.
- Backups in place: A recent backup of your WordPress site and database so you can roll back if a bulk import goes wrong.
If you’re brand new to WooCommerce and still confused about how it relates to WordPress itself, review the difference between WordPress and WooCommerce so you’re clear on which part does what.
Step 1: Audit Your Etsy Shop and Plan the Migration
Before exporting anything, you need to know what you’re moving and what will change during the move. This audit step prevents unpleasant surprises later – like missing variations, broken images, or inconsistent pricing.
1.1 Decide what data you need
Log into Etsy and open your Shop Manager. Review your current setup and note:
- Active listings: How many products you want to migrate (exclude permanently discontinued items).
- Variations: Sizes, colors, or styles you currently use in Etsy.
- Pricing & discounts: Any ongoing sale prices, coupons, or kit bundles.
- Orders: How many months or years of order history you want to keep in WooCommerce for reporting.
- Digital vs physical: Whether your products are shippable items, digital downloads, or both.
1.2 Map Etsy concepts to WooCommerce concepts
WooCommerce uses slightly different language and structure than Etsy. Sketch a quick mapping so you know how each piece will translate:
- Etsy listings → WooCommerce Products
- Etsy sections → WooCommerce Product Categories
- Etsy tags → WooCommerce Product Tags
- Etsy variations → WooCommerce Attributes + Variable Products
Also list any manual tweaks you plan to make during migration, like re-writing product titles for SEO or raising prices to cover payment processing fees.
Checkpoint: You should now have a clear list of what you’re moving (products, orders, customers) and a rough plan for how Etsy’s structure will become WooCommerce categories, tags, and attributes.
Step 2: Prepare Your WooCommerce Store
Next, make sure your WooCommerce configuration can accept your Etsy data and present it cleanly to customers. This is also when you create the core shop pages and basic options.
2.1 Complete the WooCommerce setup wizard
In your WordPress dashboard, go to WooCommerce > Home or WooCommerce > Settings. If you see the setup wizard banner, follow it and provide:
- Store address & country (for taxes and shipping)
- Default currency (usually the same as your Etsy store currency)
- Product type (physical, digital, or both)
- Basic shipping & tax preferences
2.2 Confirm essential pages exist
WooCommerce should auto-create key pages. Check under Pages > All Pages that you have:
- Shop
- Cart
- Checkout
- My Account
If any are missing, go to WooCommerce > Status > Tools and use the tool to create default WooCommerce pages.
2.3 Set SEO-friendly permalinks
To avoid ugly URLs, go to Settings > Permalinks in WordPress. Under Common Settings, choose Post name. Then scroll down to the product permalink section and pick a structure like /product/sample-product/ rather than query strings.
Checkpoint: WooCommerce is activated, the shop pages exist, and your permalinks are set to a clean, SEO-friendly structure.
Step 3: Export Your Etsy Data (Listings, Orders, Customers)
Now it’s time to pull your data out of Etsy. Etsy provides CSV exports for listings, orders, and other shop data that you can then clean up and feed into WooCommerce.
3.1 Export active listings from Etsy
- Log into Etsy and open Shop Manager.
- In the left menu, go to Settings > Options (or look for a Download Data tab, depending on your interface).
- Navigate to the Download Data section.
- Choose Currently for sale listings (or similar) and click Download CSV.
Save the CSV file to your computer and name it something clear like etsy-listings-yyyy-mm-dd.csv.
3.2 Export recent order history
If you want order data for reporting, customer service, or re-marketing, download orders too:
- From Shop Manager, go to your Orders & Shipping section.
- Look for an Export CSV option (sometimes under filters or settings).
- Choose a reasonable date range (for example, the last 12–24 months).
- Download and save the file as
etsy-orders-yyyy-mm-dd.csv.
3.3 Prepare customer data
Etsy is cautious about sharing buyer data, so you might not get a clean customer list ready for direct import. However, you can still:
- Identify repeat buyers and high-value customers.
- Collect customer email addresses where your policies and Etsy’s terms allow it.
- Plan an email campaign (from WooCommerce) informing them about your new site, with proper consent.
Checkpoint: You now have at least one CSV file with Etsy listings and optionally a second CSV file with recent orders.
Step 4: Import Products Into WooCommerce
With your Etsy listings exported, the next step is to clean the CSV and then import it into WooCommerce so your products appear in your new shop.
4.1 Clean and map the Etsy listings CSV
Open the listings CSV in Excel, Google Sheets, or another spreadsheet tool. Review the columns and adjust them so WooCommerce can understand them:
- Title: Consider mapping to a Name column that will become the WooCommerce product title.
- Description: Remove Etsy-specific references (Etsy messages, coupon notes) so your copy fits a standalone store.
- Price: Confirm currency and round up if you’re covering new payment fees.
- Quantity/Inventory: Ensure stock numbers are accurate and up to date.
- Category or section: If Etsy sections are included, you can later map them to WooCommerce categories.
WooCommerce’s CSV importer has its own set of expected column names (such as name, regular_price, description, categories). You don’t have to rename everything in the file, but clear headings make mapping easier during import.
4.2 Import via the WooCommerce product CSV importer
- In your WordPress dashboard, go to Products > All Products.
- Click the Import button at the top of the screen.
- Upload your cleaned Etsy CSV file.
- On the mapping screen, match each CSV column to the appropriate WooCommerce field (for example, Title → Name, Price → Regular price, Quantity → Stock quantity).
- Review the summary, then click Run the Importer.
Checkpoint: When the import finishes, you should see your Etsy products listed under Products in WooCommerce, with names, prices, and stock levels mostly correct.
Step 5: Rebuild Categories, Attributes, and Variations
Etsy’s simple structure doesn’t always translate perfectly into WooCommerce. To give customers a smooth browsing experience, you’ll often need to refine categories, attributes, and variations after import.
5.1 Create logical product categories
Go to Products > Categories and create a clean hierarchy that makes sense for your store:
- Use broad categories (e.g., Jewelry, Home Decor, Printables).
- Add child categories if necessary (e.g., Jewelry > Necklaces, Jewelry > Earrings).
- Assign each imported product to one primary category and optionally one or two secondary categories.
5.2 Define attributes for colors, sizes, and options
In WooCommerce, variations rely on Product Attributes. To recreate Etsy’s variation options:
- Go to Products > Attributes in your dashboard.
- Create global attributes such as Color, Size, or Material.
- Add terms (values) under each attribute, such as “Red”, “Blue”, “Small”, “Medium”, “Cotton”, etc.
You can then edit individual products and switch their product data type to Variable product, assigning attributes and defining specific variations with their own stock and pricing.
5.3 Fix imported variations that didn’t map correctly
Not all Etsy variation setups will import perfectly. For products with complex options, open them one by one and:
- Check that each variation has the correct attributes (e.g., size + color).
- Confirm each variation’s price and stock quantity.
- Remove any duplicate or unused variations that snuck in during import.
Checkpoint: Your imported products are organized into clear categories, and your most popular items have accurate variation options that mirror (or improve on) your Etsy setup.
Step 6: Configure Shipping, Taxes, and Payments
One of the biggest differences between Etsy and WooCommerce is that Etsy handles many details for you behind the scenes. In WooCommerce, you control shipping, taxes, and payments directly – which is powerful but requires careful setup.
6.1 Set up shipping zones and methods
Go to WooCommerce > Settings > Shipping and configure:
- Shipping zones: Regions you ship to (e.g., Domestic, Europe, Rest of World).
- Shipping methods: Flat rate, free shipping, or real-time carrier rates from shipping plugins.
- Costs: Update your shipping charges to reflect your actual costs outside of Etsy’s built-in calculators.
6.2 Configure taxes correctly
Next, open WooCommerce > Settings > Tax (enable it under the General tab if it’s hidden). Decide whether to:
- Use automated tax calculation plugins (if available in your region).
- Manually define tax rates per country, state, or region.
Match or improve upon your old Etsy tax behavior, and always check with a tax professional for compliance in your target markets.
6.3 Enable payment gateways
Go to WooCommerce > Settings > Payments and choose how you’ll accept money:
- Stripe or PayPal for major card payments.
- Local gateways for region-specific methods (e.g. bank transfers, e-wallets).
- Manual methods such as cash on delivery, if appropriate.
Run at least one test transaction in sandbox or with a low-value product to confirm that payment capture, order creation, and confirmation emails all work as expected.
Checkpoint: Shipping, taxes, and payments are configured in WooCommerce, and a test order flows through from product page to paid status without errors.
Step 7: Test, Launch, and Transition Away From Etsy
You now have products, structure, and payments in place. The final step is to make sure the customer experience is solid and to carefully transition traffic from Etsy to your WooCommerce store.
7.1 Test the entire buying journey
Act like a customer and walk through the site:
- Browse categories and product pages on desktop and mobile.
- Add multiple products (including variable ones) to the cart.
- Apply any coupons you plan to use.
- Checkout using your primary payment method.
- Verify that emails (order confirmation, new order notifications) are delivered correctly.
7.2 Update branding, policies, and content
Make sure your new store isn’t just a technical copy of Etsy. Update:
- About page: Explain the move from Etsy and why customers benefit.
- Policies: Match or improve your shipping, returns, and privacy policies from Etsy.
- Branding assets: Logos, colors, and typography that fit your independent brand.
7.3 Transition traffic from Etsy to WooCommerce
Since you don’t control Etsy’s servers, you can’t set traditional 301 redirects, but you can still steer customers toward your new store:
- Add your new store URL to your Etsy shop announcement and shop banner.
- Mention your new website link in product descriptions (where allowed) and on thank you or follow-up messages.
- Update all social media bios, email signatures, and marketing materials to point to your WooCommerce store.
- Gradually reduce your Etsy inventory to avoid overselling while you monitor performance on the new site.
Checkpoint: Your WooCommerce store is live, functional, and clearly promoted from your Etsy presence and other marketing channels.
Wrap Up Your Etsy to WooCommerce Migration
Moving from Etsy to WooCommerce is more than a technical exercise; it’s a strategic shift toward owning your platform, brand, and customer relationships. By auditing your Etsy data, preparing WooCommerce properly, importing and organizing products, and configuring payments and logistics, you’ve laid the groundwork for a store you fully control.
From here, you can focus on what Etsy often makes difficult: building long-term SEO, growing an email list, and designing on-site experiences tailored to your audience. With WooCommerce in place, your next wins will come from ongoing optimization, marketing, and performance tuning rather than wrestling with marketplace limitations.
Further Reading
- How to Make an eCommerce Website with WordPress
- WooCommerce Performance Tips for Faster Stores
- WooCommerce Performance for Faster Checkouts
- WooCommerce Hardening Checklist
- WordPress Backup Plugins for Online Stores
Frequently Asked Questions
Can I keep my Etsy shop open after moving to WooCommerce?
What if some of my products or images don’t import correctly into WooCommerce?
- Double-check your CSV column mapping in the WooCommerce importer, especially for the image and gallery columns.
- Confirm that the image URLs or file paths in your CSV are valid and accessible.
- For a small number of products, it may be faster to upload images manually in the product edit screen.
- If an import went badly wrong, bulk delete the affected products, adjust the CSV, and re-run the import.
My product variations look wrong after import. How can I fix them?
- Create or edit global attributes under Products > Attributes for size, color, and other options.
- Edit the affected product and change its type to Variable product.
- Assign attributes to the product and enable them for variations.
- Rebuild each variation with the correct attribute combination, price, and stock quantity.
For very complex variation setups, you may find it faster to manually re-create a few bestsellers rather than trying to make a messy import perfect.
Is it safe to use an Etsy-to-WooCommerce migration plugin or integration?
- Choose reputable plugins with many installs, recent updates, and good reviews.
- Install them only from trusted sources (WordPress.org or established vendors).
- Take a full site and database backup before granting API access or running bulk sync jobs.
- Revoke access and uninstall unused tools once the migration is complete.
How long does it take to move from Etsy to WooCommerce, and do I need a developer?
- Small shops (up to ~50 products): You can usually complete the migration in a weekend, including testing.
- Medium shops (50–300 products): Expect a few days of work to clean CSV files, rebuild variations, and tune settings.
- Large catalogs (300+ products or complex variations): Plan at least a week or more, and consider budgeting for developer or consultant help.
You don’t strictly need a developer if you’re comfortable in WordPress and spreadsheets, but professional help can save time and reduce the risk of data mistakes for larger or more complex Etsy shops.