SEO on WordPress can feel overwhelming at first, but you can get strong results once you set up the right settings, plugins, and content habits. In this tutorial, you will follow a clear, step by step process to configure your site the way search engines expect.
By the end, you will know how to prepare core WordPress settings, install and configure an SEO plugin, optimize each page or post, fix basic technical issues, and track performance so you can keep improving over time.
What You Need to Start
- Access to your WordPress admin dashboard with an Administrator account.
- An installed and working WordPress site on your chosen hosting.
- A clean, responsive theme that looks good on mobile devices.
- Basic content ready such as a homepage, a few pages, or blog posts.
- A backup plan in place so you can restore the site if needed.
Step 1: Check core WordPress SEO settings
Before you add plugins, make sure WordPress itself is not blocking search engines and that your permalinks are SEO friendly. These core settings create clean URLs and allow your pages to be indexed properly.
- Log in to your dashboard at yourdomain.com/wp-admin.
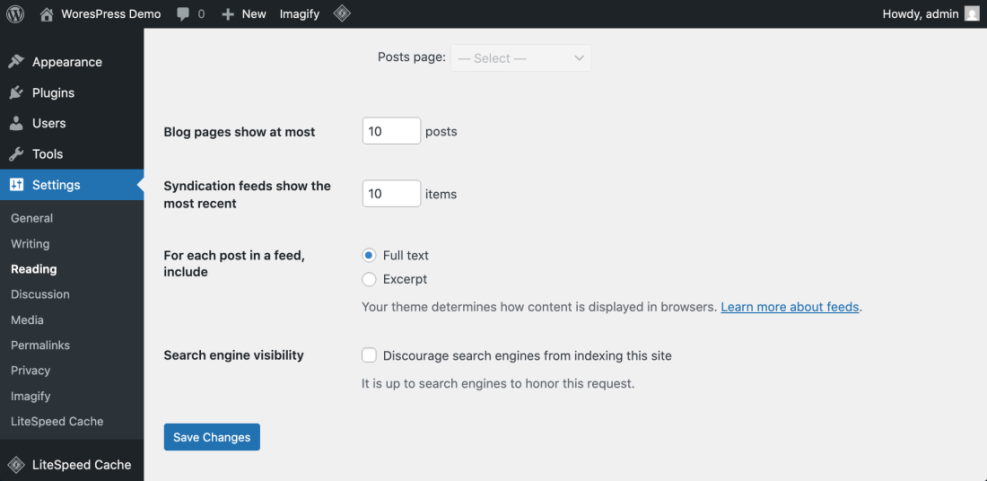
- Navigate to Settings » Reading.
- Find the option Search engine visibility and make sure the checkbox is not checked.
Navigate to Settings » Reading and check the search engine visibility option.
- Go to Settings » General and confirm your Site Title and Tagline describe your brand and main topic.
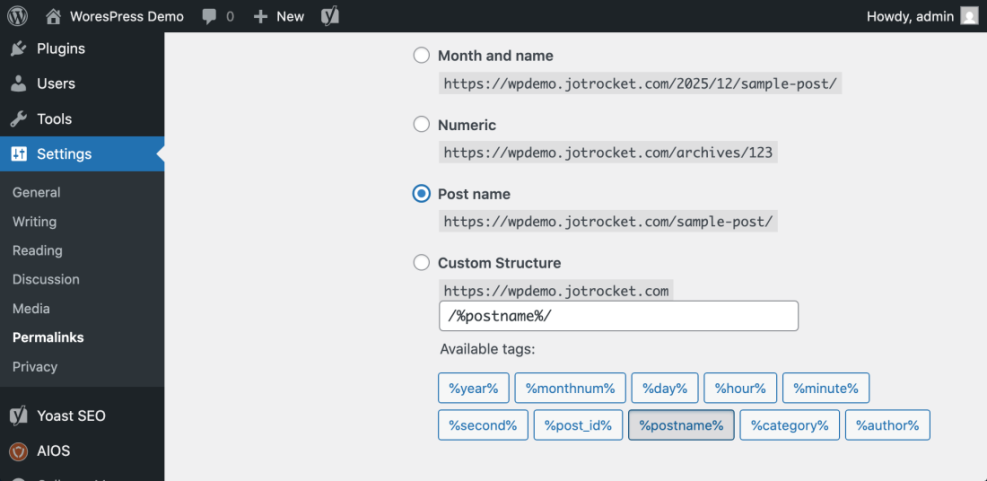
- Navigate to Settings » Permalinks.
- Select the Post name structure for clean, keyword friendly URLs.
- Click Save Changes.
Navigate to Settings » Permalinks to set Post name structure.
To go deeper into these basics later, read Beginner Guide to WordPress Permalinks.
To verify this step, open any post on the front end and confirm the URL uses readable words instead of numbers or dates, and ensure your site is visible when you search your brand name in Google after a short delay.
Quick Overview of SEO Methods in WordPress
Before we dive into each section in detail, here is a quick overview of the main ways you will use WordPress to improve SEO and where each method lives in your dashboard.
| Method | Where You Use It | Main Purpose |
|---|---|---|
| Configure Core SEO Settings | Settings » Reading, Settings » General, Settings » Permalinks | Make sure search engines can index your site and create clean, readable URLs that include keywords. |
| Install and Configure an SEO Plugin | Plugins » Add New, SEO plugin settings panel | Control SEO titles, meta descriptions, sitemaps, and schema from one place without touching code. |
| Optimize Pages and Posts for Keywords | Posts » All Posts / Pages » All Pages » Edit | Target clear keyword topics on each URL and improve relevance with optimized titles, content, and images. |
| Improve Speed and Technical SEO | Plugins » Add New (caching, optimization), hosting panel, HTTPS settings | Speed up page load times, enable caching, compress images, and make your site secure and mobile friendly. |
| Build Internal Links and Site Structure | Appearance » Menus, post editor link tool | Help visitors and search engines discover your best content with smart navigation and contextual links. |
| Track SEO Performance and Refine | Google Analytics, Google Search Console | Measure traffic, rankings, and clicks so you can improve pages and plan new SEO focused content. |
Step 2: Install and configure an SEO plugin
An SEO plugin helps you manage titles, meta descriptions, XML sitemaps, and on page checks without editing code. You only need one plugin for this job, so choose one reputable option and configure it carefully.
- In your dashboard, go to Plugins » Add New.
- Use the search box to look for a popular SEO plugin such as Yoast SEO, All in One SEO, or Rank Math.
- Click Install Now, then click Activate once installation completes.
Open Plugins » Installed Plugins to confirm your SEO plugin is active.
- Look for the new SEO menu item in your sidebar, such as SEO or the plugin name.
- Run the plugin’s initial setup wizard if it appears, and follow the prompts to set your site type, organization details, and visibility preferences.
- Enable the XML sitemap feature inside the plugin settings.
To see a slower, step driven walkthrough later, you can follow How to install a plugin in WordPress.
To verify success, confirm that the SEO plugin menu appears in your sidebar and visit the sitemap URL shown in the plugin (often /sitemap.xml) to ensure it loads without errors.
Step 3: Optimize pages and posts for keywords
With your SEO plugin active, the next step is to optimize each important page or post for a clear keyword topic. This helps search engines understand what each URL should rank for and improves click through rates.
- Use a keyword tool to find a primary phrase for each page; if you are new, review Best keyword research tools for seo for guidance.
- In your dashboard, go to Posts » All Posts or Pages » All Pages and click Edit on an important piece of content.
- Scroll down to the SEO plugin panel and enter your keyword in the Focus keyphrase or similar field.
Open the post editor and scroll to the SEO meta box below the content area.
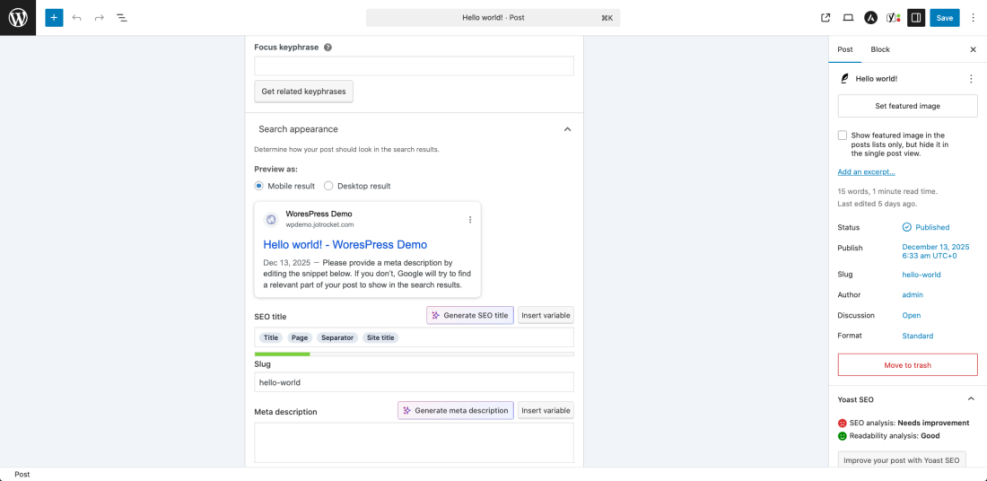
- Edit the SEO Title so it includes your main keyword naturally and looks compelling in search results.
- Write a clear Meta description that summarizes the benefit of the page and includes the keyword once.
- Check the URL Slug and simplify it to a short, readable version of your keyword.
- Use headings inside the content, such as Heading 2 and Heading 3, to break up sections and include related phrases.
Click on an image inside the post and open the Alt Text field in the settings sidebar.
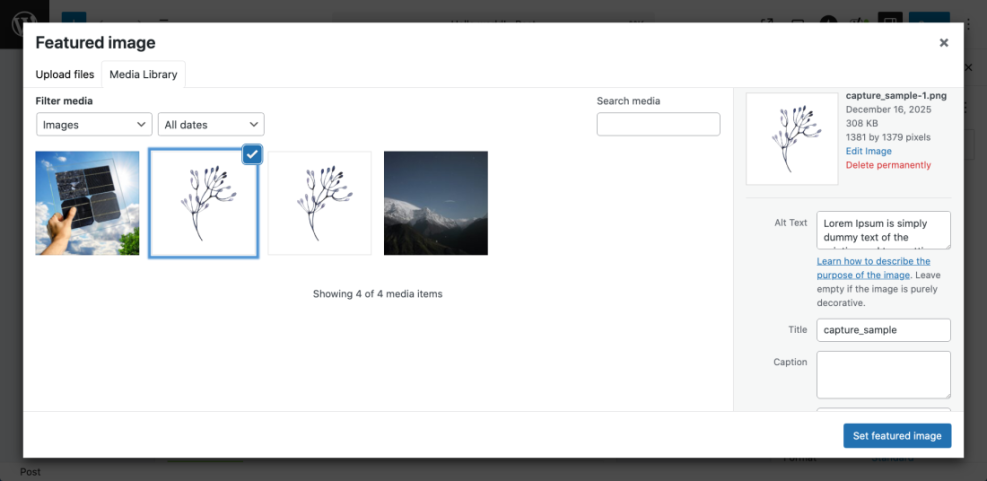
- Add descriptive Alt text that explains the image and, where natural, includes a supporting keyword.
- Add at least two relevant internal links to other helpful content on your site, such as guides and checklists.
For a deeper checklist to reuse on every article, see Is WordPress good for seo or WordPress seo complete beginners guide.
To verify, use the SEO plugin’s content analysis tool and aim to resolve key warnings, while still writing naturally for readers rather than forcing keywords.
Step 4: Improve speed and technical SEO basics
Search engines reward faster, secure, and mobile friendly sites, so basic technical SEO is essential. WordPress makes this easier with caching, image optimization, and solid hosting.
- Install a reputable caching plugin if your host does not provide server level caching.
- Navigate to Plugins » Add New, search for a caching plugin recommended by your host, then click Install Now and Activate.
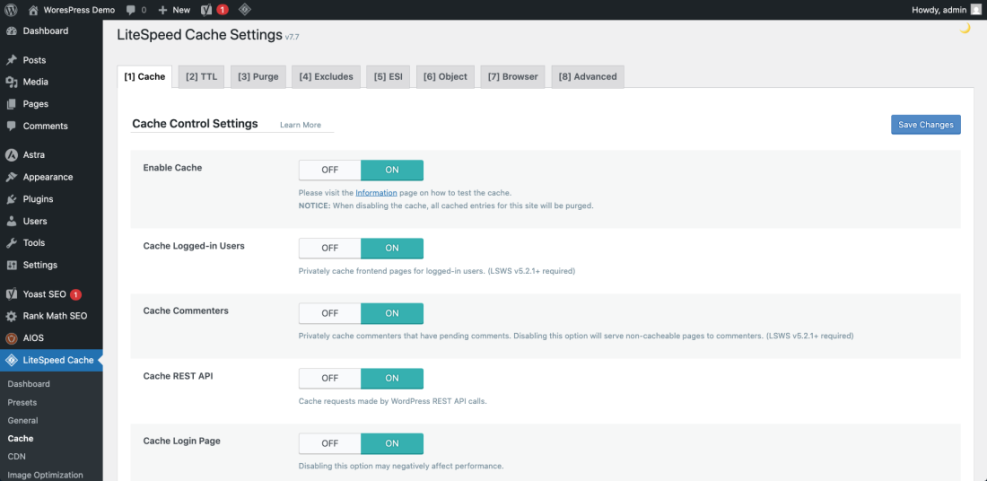
- Use the plugin’s default or beginner friendly settings to enable page caching and, if available, browser caching.
Open your caching plugin settings page from the WordPress sidebar.
- Compress large images before uploading, or install an image optimization plugin to automate compression.
- Make sure your site runs over HTTPS with a valid SSL certificate.
- Test your site speed with a tool such as PageSpeed Insights and note any major issues.
If you need a full walkthrough, you can later read Beginner guide to WordPress speed optimization and Beginner guide WordPress speed core web vitals.
Optionally, create a simple robots.txt file at the site root to give crawlers basic instructions:
User-agent: *
Disallow: /wp-admin/
Allow: /wp-admin/admin-ajax.php
Sitemap: https://example.com/sitemap.xml
For more details on this file, review the official WordPress.org SEO documentation.
To verify improvements, rerun your speed test and confirm your overall score and Core Web Vitals have improved or at least not worsened after enabling caching and compression.
Step 5: Build internal links and site structure
A clear internal linking structure helps visitors discover more of your content and helps search engines understand which pages are most important. Good navigation and contextual links can boost rankings significantly over time.
- Ensure you have a primary navigation menu under Appearance » Menus that links to your key pages.
- Group related posts into logical categories rather than using many random categories.
- When editing a post, highlight relevant text and click the Link button to add a link to another helpful post or page.
Edit a post and use the link icon above the content editor to add an internal link.
- Add links from older, authoritative posts to newer related posts to spread link equity.
- Aim for every important page to have at least a few internal links pointing to it.
For strategy examples and checklists, see Internal linking strategies WordPress.
To verify, pick one key page and count its internal links using your SEO plugin or a simple content audit; update posts until each important URL has strong connections from related content.
Step 6: Track SEO performance and refine
SEO is an ongoing process, so you need analytics and search data to see what works. Tracking helps you double down on winning content and fix low performing pages.
- Set up Google Analytics or another analytics tool on your site; if you use GA4, follow Analytics setup WordPress google analytics for a step by step process.
- Verify that pageviews and sessions are recording by visiting your site in a private browser window.
- Create a free Google Search Console property and verify ownership of your domain.
- Submit your XML sitemap URL from the SEO plugin to Google Search Console.
Open the Google Search Console Sitemaps section and paste your sitemap URL.
- After a few days, review the Performance report to see clicks, impressions, and average position for your key pages.
- Identify pages with many impressions but low click through rate and improve their titles and meta descriptions.
To plan new content based on data, later read How to add google search console to WordPress.
To verify, confirm that Analytics and Search Console both show steady data and that your indexed pages and clicks increase month by month.
Conclusion You Are Ready to Go
You have now learned how to do SEO on WordPress using a practical, step by step method. Your core settings are correct, your SEO plugin is configured, your content is optimized for clear keywords, and your site is faster and easier to crawl.
From here, continue publishing helpful content, refining your internal links, and checking your analytics and Search Console regularly. Over time, these consistent habits will help you earn higher rankings, more organic traffic, and better leads or sales from your WordPress site.
Further Reading
- WordPress seo complete beginners guide
- Is WordPress good for seo
- Is WordPress good for seo
- Is WordPress good for seo
- How to add keywords in WordPress without hurting