How to Delete WordPress Account Safely
Step by step guide for WordPress.com and self hosted
Deleting a WordPress account too quickly can cost you posts, media, and even full sites. With a simple plan you can protect your content, remove the right account, and keep your remaining sites running smoothly.
In this guide you will learn how to delete a WordPress.com account, remove a user from a self hosted WordPress site, and confirm that nothing important disappears. By the end you will know exactly which buttons to click and which data to save first.
What You Need to Start
- Login details for your WordPress.com account or your self hosted WordPress admin area.
- Access to the email address linked to the account you plan to delete.
- Access to your web hosting control panel for self hosted sites if you need backups.
- Enough time to export or download any content you might want later.
- Administrator level access on self hosted WordPress if you want to remove a user.
Step 1: Identify Which WordPress Account You Want to Delete
Before you press any delete button, figure out which type of WordPress account you use. WordPress.com handles hosted accounts on their platform, while self hosted WordPress stores users in your own database on your server. Use the checklist below to pin that down.
- Check how you usually sign in. If you log in at WordPress.com, you most likely use a WordPress.com account. If you log in at yourdomain.com/wp-admin, you use a self hosted site account.
- Write down all sites connected to that account or user so you know what else relies on those login details.
- Decide what you really want to remove: a personal profile, one user on one site, or a full website.
If your real goal is to remove an entire self hosted site, follow the dedicated guide How to publish WordPress site instead of only deleting a user.
Step 2: Back Up Your Content Before Deleting Anything
A quick backup turns a risky account removal into a safe and reversible change. Take a moment to export your content and, if possible, copy the whole site.
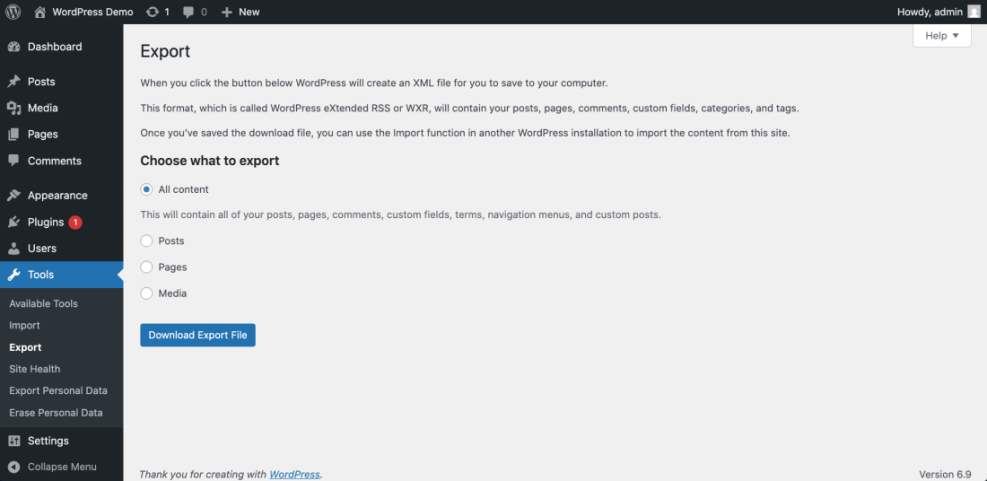
Export Content from WordPress.com
- Sign in to WordPress.com and open the site that contains the content you want to save.
- From the left menu, go to Tools > Export.
- Click Export all to download a file with your posts and pages to your computer.
Export Content from a Self Hosted WordPress Site
- Log in to your self hosted dashboard. If you need help, see How to integrate WordPress into website.
- In the left sidebar, choose Tools > Export.
- Select All content and press Download Export File to save the XML file.
Create a Full Site Backup
- For a complete backup that includes themes, plugins, uploads, and database, follow How to backup a WordPress site or Beginner guide to WordPress speed optimization.
- Store export files and backups in safe locations such as cloud storage or an external drive so you can restore them later.
Step 3: Delete a WordPress.com Account Safely
Removing a WordPress.com account closes your profile, login, and access to associated services. To avoid surprises, walk through the account settings slowly and confirm what you lose with that account.
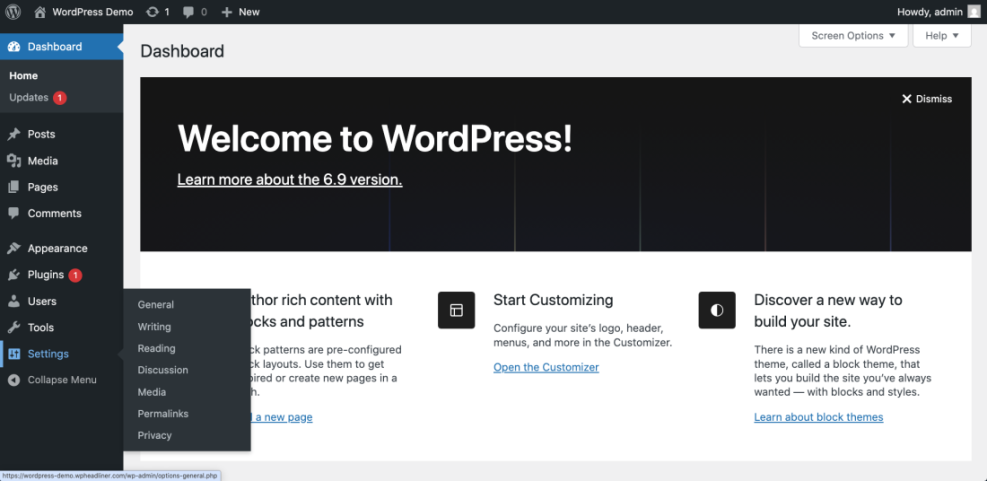
Open Account Settings
- Visit https://wordpress.com/log-in and sign in with the account you want to delete.
- Click your profile avatar in the top right corner of the dashboard.
- Choose Account Settings from the drop down menu.
Start the Account Deletion Process
- Scroll to the bottom of the Account Settings page until you find the section about closing your account.
- Select the option labeled something like Close your account permanently to begin the deletion flow.
- Read each warning message and note which sites, purchases, or services will disappear with this account.
Confirm and Finalize Deletion
- Type any requested confirmation phrase or account name when the screen prompts you to do so.
- Click the final Close account or Delete account button to submit the request.
- Open your email inbox, find the confirmation message from WordPress.com, and click the link to complete the deletion.
After you confirm via email, try to sign in again with the same details. The login form should show an error that the account no longer exists. For extra information about available account options, review the WordPress.com account settings documentation.
Step 4: Delete a Self Hosted WordPress User from the Dashboard
On a self hosted WordPress site, removing an account means deleting a user record from your database. To keep blog posts and pages online, reassign that user’s content to another account instead of wiping it.
Open the Users Screen
- Sign in to your dashboard at https://yourdomain.com/wp-admin. If you struggle with this, follow How to integrate WordPress into website.
- From the left menu, navigate to Users > All Users.
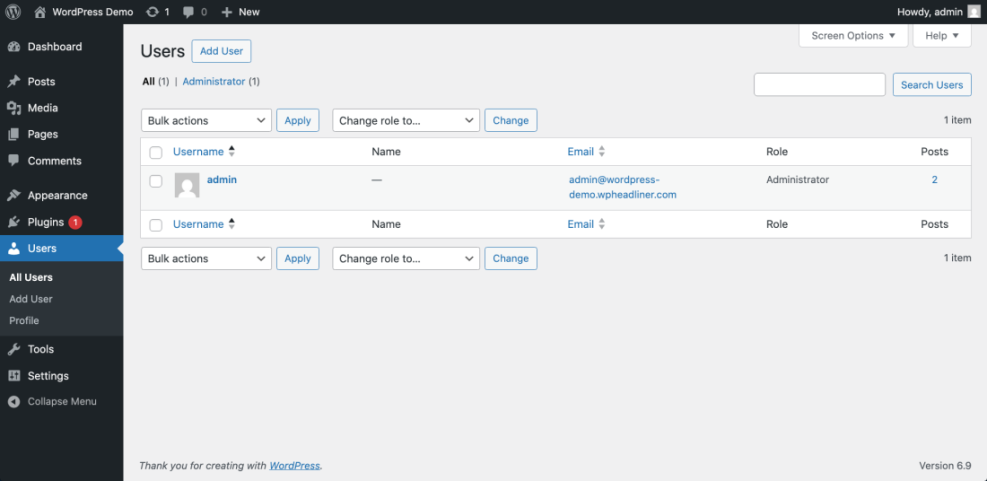
Remove the Selected User Safely
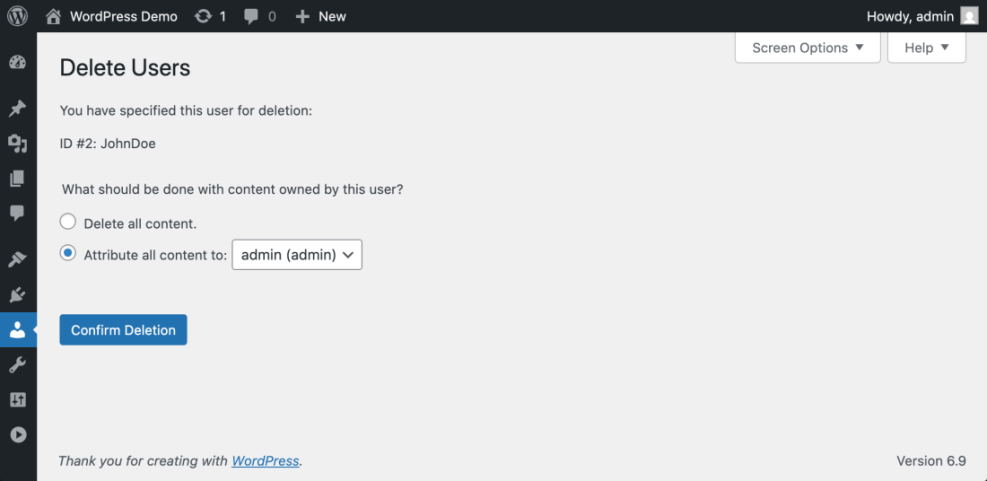
- Locate the user account you want to remove. Hover over the username and click Delete.
- On the confirmation screen, choose whether to Delete all content or Attribute all content to another user.
- Pick a replacement user if you want to keep that content available on your site.
- Press the final Confirm Deletion button to remove the user account.
Check Authors After Deletion
Return to Users > All Users and make sure the old username no longer appears. Then open a few posts originally written by that user and confirm that WordPress now attributes them to the new account you selected.
Step 5: Delete a WordPress User with Code or Command Line
Sometimes you cannot reach the WordPress dashboard, but you still control the server. In that situation you can remove a user programmatically using a short PHP script.
Create a Temporary PHP Script
- Get SEO and UX, and where you will see it in daily work.”>SFTP or SSH credentials from your hosting control panel.
- Connect to the server and open your WordPress installation directory, typically named public_html or htdocs.
- Use a code editor or the file manager to create a temporary file, for example delete-user.php, in the WordPress root directory.
Add Code to Delete the User
- Paste the following code into the file, then adjust the user IDs to match your site. Save the file after editing.
// Load WordPress require_once __DIR__ . '/wp-load.php'; // ID of the user to delete $user_id_to_delete = 3; // ID of the user who should receive the deleted user's content $reassign_to_user_id = 1; if ( function_exists( 'wp_delete_user' ) ) { wp_delete_user( $user_id_to_delete, $reassign_to_user_id ); echo 'User deleted successfully'; } else { echo 'wp_delete_user function not available'; } Run and Remove the Script
- Open https://yourdomain.com/delete-user.php in your browser to run the script once. A success message should appear when the script finishes.
- Delete the temporary delete-user.php file from your server immediately so nobody else can run it.
After you regain dashboard access, visit Users > All Users and confirm that the targeted user ID no longer appears in the list.
Step 6: Confirm Your WordPress Account Is Fully Removed
Once you delete an account or user, run through a short checklist. These quick tests confirm that the right account disappeared and that everything else still works.
Test Logins
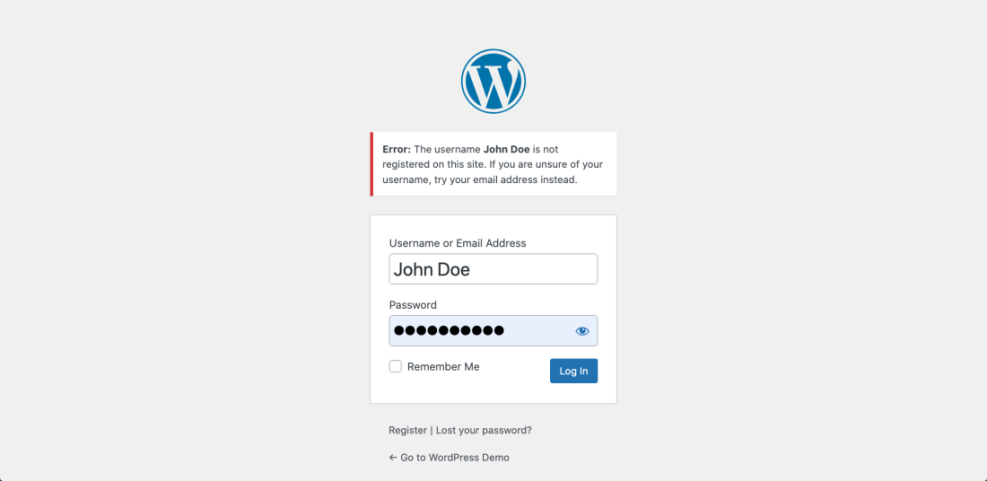
- Attempt to log in as the deleted user on WordPress.com or your self hosted site.
- Make sure the login form reports that the username or email address is invalid.
Check Your Site Front End
- Browse your site as a normal visitor using a different browser or an incognito window.
- Confirm that posts, pages, menus, and widgets display correctly without errors.
Review Integrations and Services
- Open any integrations linked to that account such as Jetpack, API keys, or third party services.
- Update those services to use an active account so they continue to function correctly.
If all of these checks look good and you have stored backups safely, you can consider the account cleanup complete.
Conclusion: You Are Ready to Move On
Now you know how to delete a WordPress.com account and remove a user from a self hosted WordPress site without losing valuable content. Careful backups, smart reassignment of posts, and simple verification steps keep your WordPress setup clean and secure.
Should you decide to build a new site or start again with a different account in the future, your exported content and backups will help you launch quickly and confidently.
Further Reading
- How to publish WordPress site
- How to backup a WordPress site
- Beginner guide to WordPress speed optimization
- How do i secure my WordPress downloads
- How to integrate WordPress into website