If you are not sure how to save in WordPress, you are not alone. The options to Save Draft, Update, and autosave can be confusing, and many beginners worry about losing work. Once you understand how saving works, it becomes simple to save in WordPress every time you edit.
In this guide you will learn how to save new posts as drafts, how to update published pages safely, and how to recover work using autosaves and revisions. You will be able to leave the editor with confidence that your changes are stored correctly.
What You Need to Start Saving in WordPress
- A working WordPress site where you can log in as an Administrator, Editor, or Author.
- Access to the WordPress admin dashboard at yourdomain.com/wp-admin.
- At least one post or page to practice with, or permission to create new content.
- A basic understanding of either the Block Editor (Gutenberg) or the Classic Editor.
Step 1: Open the WordPress Editor Before You Save in WordPress
Before you can save anything, you need to open the editor for a new or existing post or page. The location of the save buttons depends on whether you are creating something new or editing existing content.
- Log in to your WordPress dashboard.
- In the left menu, click Posts » Add New to create a new blog post.
- To edit an existing post, click Posts » All Posts, hover over a title, then click Edit.
- For pages, repeat the same steps under Pages instead of Posts.
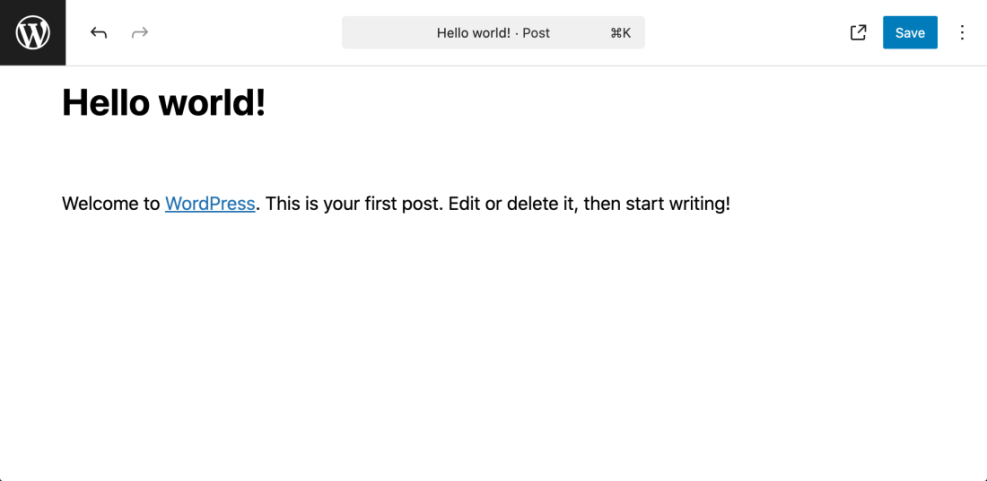
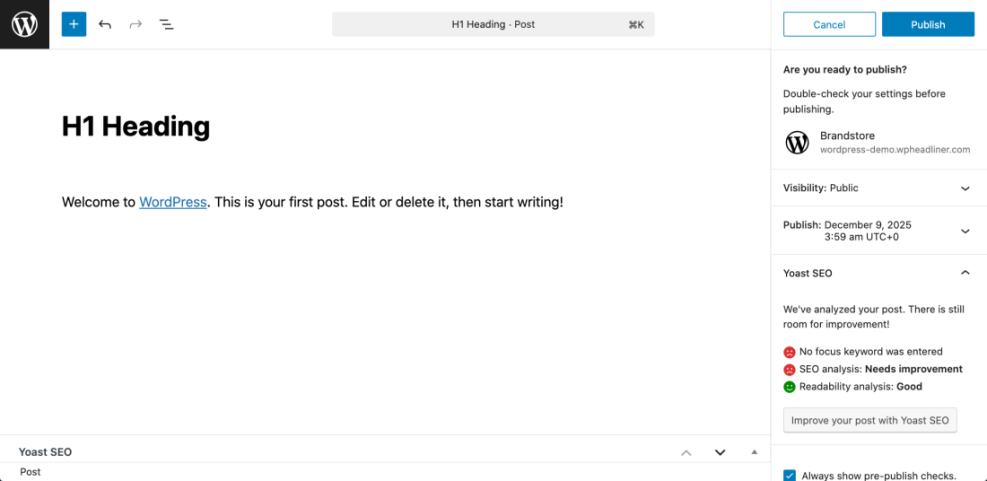
Step 2: Save a New Post as a Draft in WordPress
When you first create content, you usually want to keep it private until it is ready. Saving as a draft stores your work in the database without making it visible to visitors.
- While editing a new post, look at the top right of the screen in the Block Editor or the right sidebar in the Classic Editor.
- In the Block Editor, click the three dot menu if needed, then confirm the post is set to Draft.
- Click Save Draft if the button is visible, or click the Save icon that looks like a floppy disk.
- In the Classic Editor, click the Save Draft button in the Publish box.
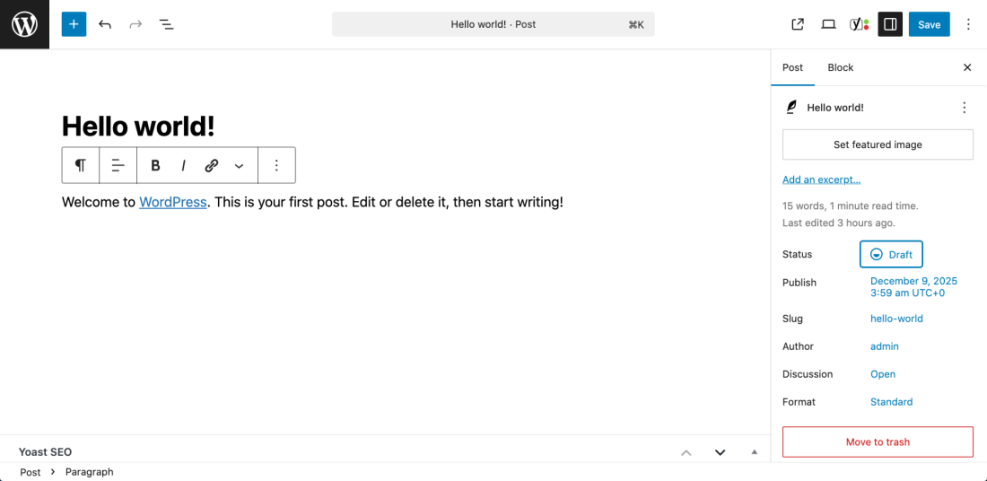
After saving, look for a small confirmation message such as “Draft saved” near the top or bottom of the screen. This tells you WordPress successfully stored your current work.
Step 3: Preview Before You Save in WordPress and Publish
Previewing lets you see how your draft will look on your site without making it public. This is a safe way to check formatting and layout before you publish.
- In the Block Editor, click Preview in the top right corner.
- Choose whether to preview on Desktop, Tablet, or Mobile if those options are available.
- In the Classic Editor, click the Preview or Preview Changes button in the Publish box.
- A new tab will open with a temporary preview URL only you (while logged in) can see.
If the preview shows the latest text and images you added, your most recent save worked correctly.
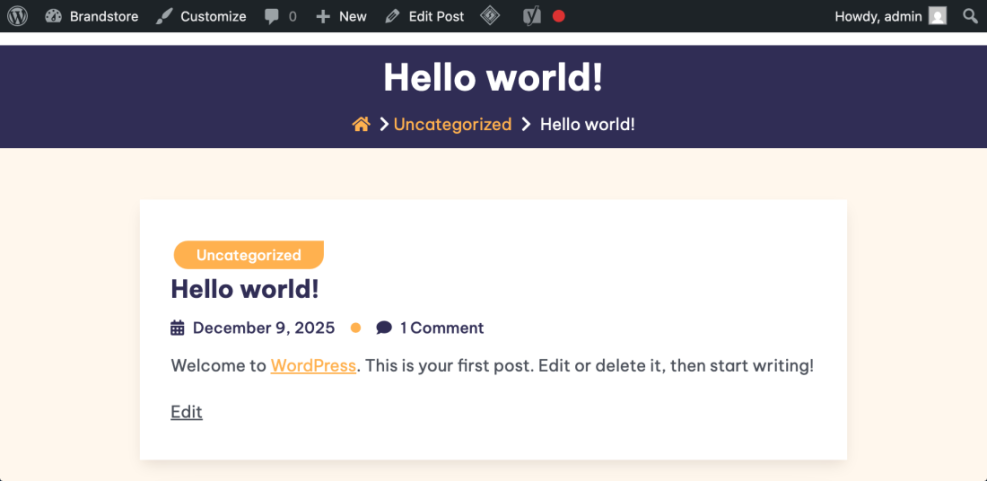
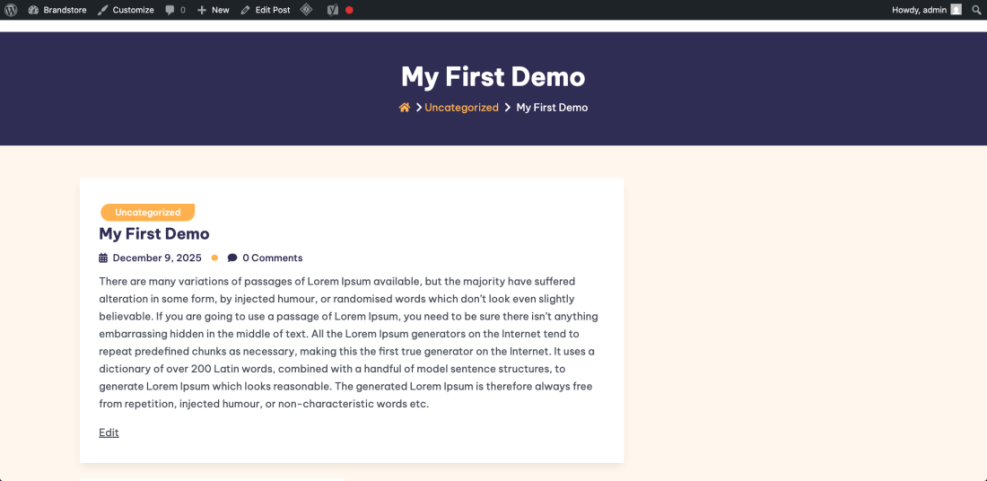
Step 4: Publish or Schedule Your Saved WordPress Content
Publishing makes your content visible to site visitors. WordPress gives you the choice to publish immediately or schedule a future date, but both actions rely on the same save process.
- In the Block Editor, click the blue Publish button in the top right.
- Review the visibility and date options. Set Visibility to Public if you want everyone to see it.
- If you want to schedule, click the date next to Publish and choose a future time.
- Click Publish again to confirm.
- In the Classic Editor, configure options in the Publish box, then click Publish.
Open your site in another tab and visit the post URL. If you can see the content live, WordPress saved and published your changes successfully.
Step 5: Update Existing Posts and Save in WordPress Safely
Once a post is already published, the save button changes to Update. This still saves your work, but it also overwrites the live version with your latest changes.
- From the dashboard, go to Posts » All Posts and click Edit under the post you want to change.
- Make your edits in the editor, such as fixing typos or adding new sections.
- In the Block Editor, click the blue Update button in the top right.
- In the Classic Editor, click the Update button in the Publish box.
- Reload the post on the front end to confirm your changes appear as expected.
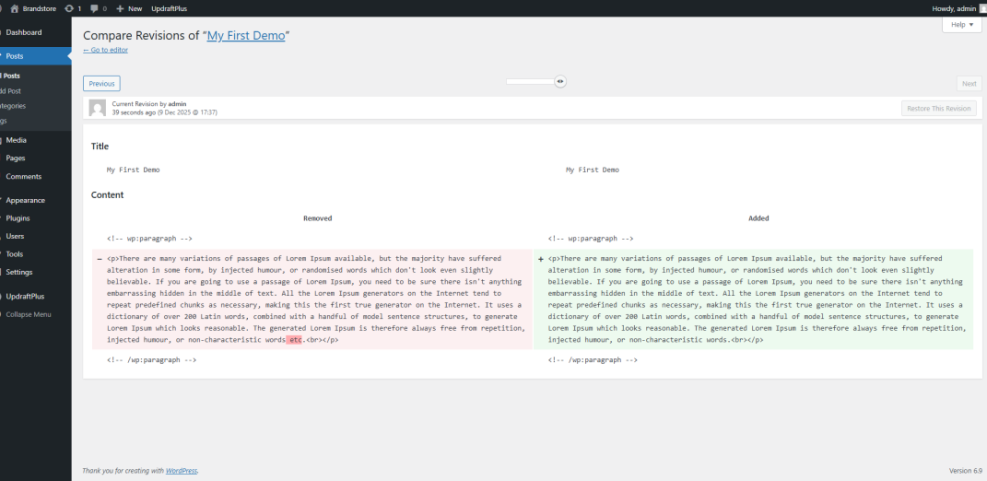
Step 6: Recover Saved Work with Autosaves and Revisions in WordPress
WordPress automatically creates autosaves and stores each major update as a revision. These features protect you if your browser crashes or if you accidentally overwrite good content.
- While editing a post, look at the sidebar or Publish box for a Revisions link.
- Click Revisions to open the comparison screen.
- Use the slider at the top to move between older versions of your content.
- Check the differences highlighted in red and green to see what changed.
- Click Restore This Revision if you want to roll back to that saved version.
Step 7: Advanced Settings for Saving in WordPress (Autosaves and Revisions)
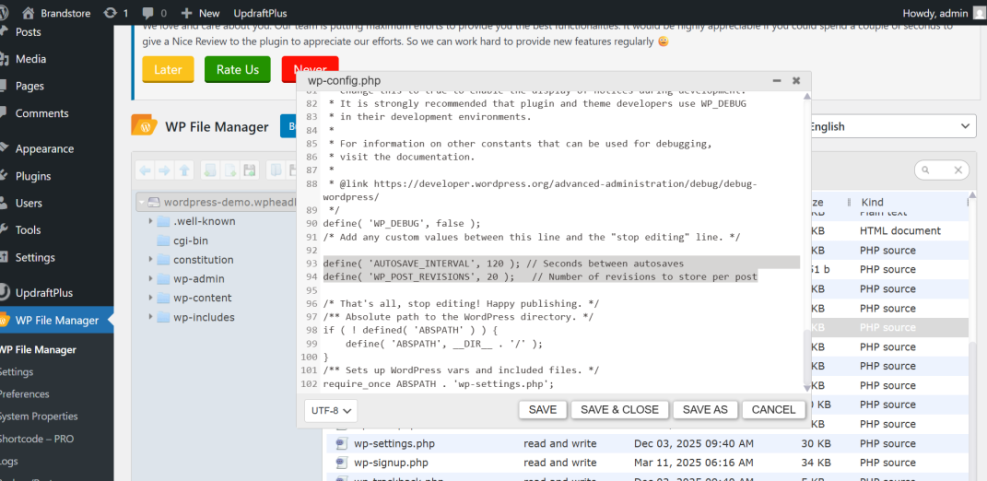
If you write long posts or work on a slow connection, you might want to adjust how often WordPress autosaves and how many revisions it keeps. This is an advanced step and requires editing a configuration file.
- Connect to your site using FTP or your hosting file manager.
- Locate the file named wp-config.php in the root of your WordPress installation.
- Download or open the file in a text editor.
- Add the following lines above the comment that says “That’s all, stop editing” if they are not already defined.
define( 'AUTOSAVE_INTERVAL', 120 ); // Seconds between autosaves
define( 'WP_POST_REVISIONS', 20 ); // Number of revisions to store per post- Save the file, then upload it back to your server if you edited it locally.
- Create or edit a post and work for several minutes to confirm autosaves still appear as expected.
Step 8: Fix Common Save in WordPress Problems
Sometimes WordPress refuses to save or shows errors like “Updating failed.” These problems are usually related to plugins, caching, or connection issues, not the save button itself.
- First, copy your current content to a safe place such as a text file, just in case.
- Open a different browser or a private window and try saving again.
- Temporarily disable caching or security plugins, then try clicking Save Draft or Update once more.
- Check that your internet connection is stable and that you are still logged in to WordPress.
- Review your hosting error logs or contact your host if you continue seeing save errors.
- For more technical details, consult the official WordPress editor documentation.
Compare Ways to Save in WordPress and Maintain Your Site
Beyond clicking Save Draft or Update, different maintenance approaches can help prevent problems and keep your saved content healthy over time.
| Method | Where You Use It | Main Purpose |
|---|---|---|
| DIY Manual Maintenance | WordPress dashboard and hosting control panel | Maximum control over updates, theme and plugin changes, and manual checks for title issues on small or low-risk sites. |
| Managed Hosting Tools | Your host’s control panel or custom dashboard | Simplify routine maintenance with one-click updates, built-in backups, and basic monitoring so template problems are less likely to appear. |
| SEO, Maintenance & Security Plugins | Plugins section inside the WordPress dashboard | Automate repetitive tasks like backups, database cleanup, image optimization, and security scans, while also running periodic audits of titles and meta tags. |
| WP-CLI and Developer Tools | SSH terminal with WP-CLI and deployment tools | Scriptable, fast maintenance for developers managing multiple or complex sites, including scanning themes for legacy header.php markup. |
| Professional WordPress Care Plan | External provider, freelancer, or agency | Hands-off maintenance with proactive monitoring, regular audits, and expert fixes so problems like duplicate titles are caught early. |
Conclusion You Are Ready to Save in WordPress
You now understand how to save in WordPress at every stage of editing. You can create drafts, preview changes, publish new posts, update existing content, and use autosaves and revisions to protect your work.
With these habits, you will spend less time worrying about losing changes and more time creating content. Each time you click Save Draft or Update, you know exactly what happens behind the scenes.


