How to Create a WordPress Blog for Beginners
Launch a simple self hosted site without getting stuck

How to Create a WordPress Blog for Beginners Today
Creating a WordPress Blog is easier than it looks. You can start even if you have never built a website before. This step by step guide gives you one simple path. You will use beginner friendly shared hosting and a one click WordPress installer.
By the end, you will own your domain name and log in to a working WordPress dashboard. You will install a clean blog theme and add essential plugins. You will also publish your first post and prepare your new blog for SEO and security.
What You Need Before You Start
Basic requirements
- A blog idea and a short list of possible domain names.
- A debit or credit card for your first year of hosting and domain registration.
- About 45 to 60 minutes of focused time.
- A desktop or laptop with a stable internet connection.
Choosing beginner friendly hosting
You also need a shared WordPress host with a one click installer. This type of host removes many technical steps. Instead of uploading files by hand, you follow a simple wizard. If you need help choosing, compare options in Best WordPress Hosting for Beginners.
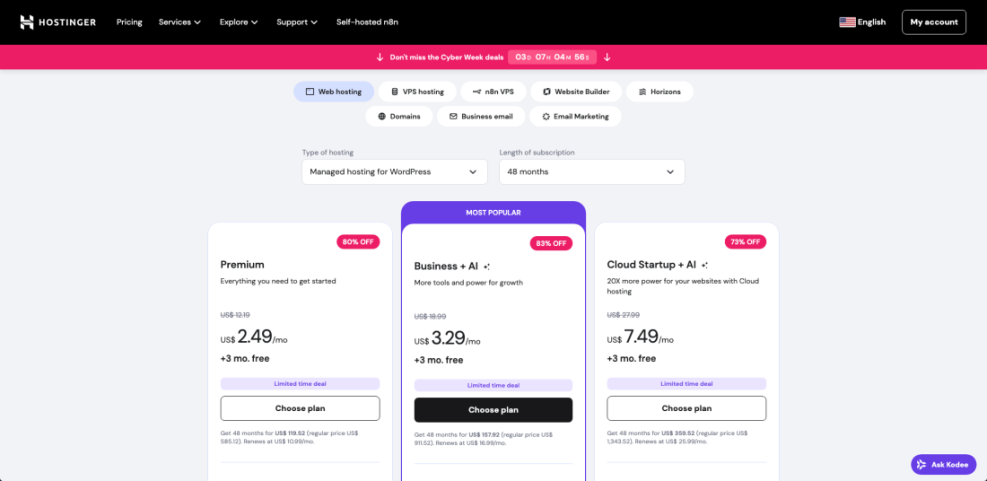
Step 1: Choose hosting and domain
Compare beginner friendly hosting plans
Before you install WordPress, you need hosting and a domain name. Hosting stores your files. The domain is the address people type in their browser. A simple shared hosting plan usually costs less and is easy to manage.
- Open your browser and visit a beginner friendly host suggested in Best WordPress Hosting for Beginners.
- Go to the pricing page and look for a plan that mentions WordPress, Blog or One Click Install.
- Click the plan’s Get Started or Select button to begin checkout.
Pick a simple, memorable domain name
- Search for your preferred domain name.
- Choose a suitable extension such as .com or .net and add it to your cart.
- Review any added extras. Uncheck items you do not need, such as premium email or site builders.
- Enter your billing details. Create a strong hosting account password. Then confirm your order.
On the host signup screen, make sure the plan clearly mentions WordPress or a blog setup. This keeps things simple and avoids tools that are not necessary.
After checkout, your host will send confirmation emails. These emails usually include your hosting login URL and credentials. Log in to your hosting dashboard once to confirm everything works before you move on.
Step 2: Install WordPress on your domain
Open your host’s WordPress installer
Now you are ready to install WordPress. Most shared hosts provide a one click installer. This tool creates the database and copies the files for you. As a result, you get a working blog in a few minutes.
- Log in to your hosting account with the username and password you created.
- Open the hosting control panel. Many hosts label this cPanel, Dashboard or My Sites.
- Look for a section called WordPress, Website, Softaculous or App Installer.
- Click the WordPress icon.
- Click the Install or Install Now button to start the wizard.
Fill in key installation details
- Select your domain name from the drop down list.
- Leave the Directory or Folder field empty. This installs WordPress at https://yourdomain.com instead of a subfolder.
- Enter a Site Name and Site Description. You can change both later.
- Create an Admin Username and a strong Password. Avoid using “admin” as the username. It is too easy to guess.
- Enter an Admin Email that you check often.
- Scroll down and click Install. Wait while the installer runs.
Before you click Install, double check the domain, directory, site name and admin details. A quick review now prevents problems later.

When the installer finishes, it will show two links. One link opens your new site homepage. The other link opens your admin login page, usually https://yourdomain.com/wp-admin. Visit both pages to confirm that WordPress installed correctly.
Step 3: Log in and configure basic settings
Update general site details
Next, you will adjust a few important settings. Doing this early prevents messy URLs and wrong time zones. It also makes sure your blog is visible to search engines.
- Visit https://yourdomain.com/wp-admin in your browser.
- Enter your Username and Password, then click Log In.
- In the left sidebar, go to Settings » General.
- Update the Site Title and Tagline so they match your blog brand.
- Set your Timezone, Date Format and Time Format.
- Click Save Changes.
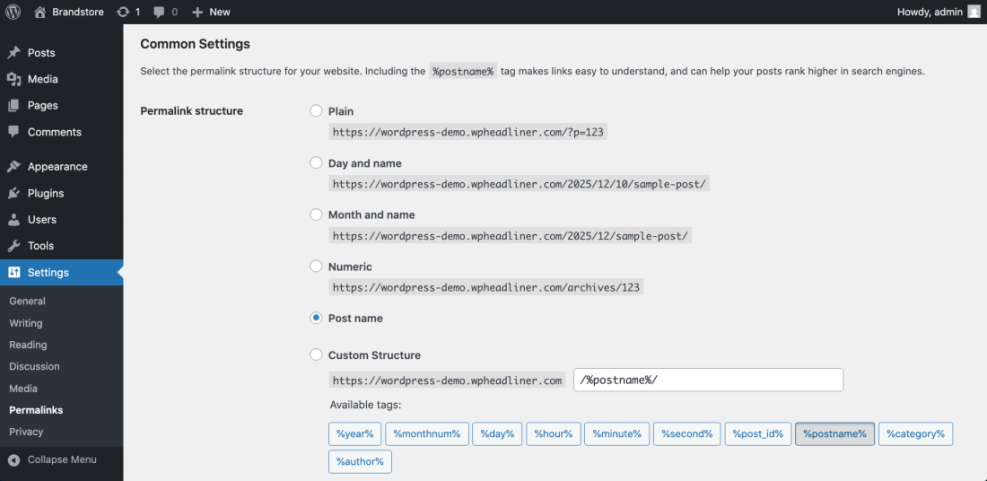
Set SEO friendly permalinks
- Go to Settings » Permalinks.
- Select the Post name option. This makes URLs look like /my-first-blog-post/.
- Click Save Changes.
- Now go to Settings » Reading.
- Make sure Discourage search engines from indexing this site is not checked.
In the Permalinks screen, check that Post name is selected before you save. This structure is simple, clear and good for SEO.
To confirm success, open a sample post. Look at the URL and check that it includes the post title words. Also check that date and time display correctly on your site.
Step 4: Choose and install a blog theme
Browse modern, lightweight themes
Your WordPress Blog now works, but the default theme is very basic. A modern, lightweight theme improves readability and speed. It also makes your site look more professional.
- From the dashboard, go to Appearance » Themes.
- Click the Add New button at the top.
- Use the Search themes box to find blog focused themes.
- Filter by Popular or Block Themes if these options are available.
Install and activate your chosen design
- Click a theme thumbnail, then click Preview to see a demo layout.
- When you find a theme you like, click Install.
- After installation, click Activate.
On the themes screen, try search terms such as “blog”, “magazine” or “minimal”. This approach helps you find a design that fits your niche and style.

To confirm the new theme is active, open your blog homepage in a new tab. Refresh the page. You should see the new design, fonts and layout applied to your posts.
Step 5: Install essential plugins for your blog
Clean up default plugins
Plugins add features to your blog. They handle SEO, security, backups, contact forms and more. However, too many plugins can slow your site. So you should start with only the most important ones.
- In the sidebar, go to Plugins » Installed Plugins.
- Review the list. Many hosts add extra tools by default.
- Deactivate and delete plugins you know you will not use.
Add SEO, backup, security and forms
- Click Add New at the top of the Plugins screen.
- Search for an SEO plugin with good ratings and many active installs.
- Search for a reliable backup plugin and a security plugin.
- Search for a simple contact form plugin as well.
- For each plugin you choose, click Install Now and then click Activate.
- Open the settings page for each plugin and follow any setup wizard.
On the Add Plugins screen, always check ratings and active installs. This quick check helps you avoid weak or outdated tools.

After activation, test each plugin. Submit a test form, confirm a backup schedule and look for a new SEO box when you edit a post.
Step 6: Create your first blog post
Open the editor and remove default content
Your site is ready for real content. A first post gives visitors something to read and lets you learn the editor.
- From the dashboard, go to Posts » All Posts.
- Delete the default “Hello world” post if you do not need it.
- Click Add New to create a fresh post.
Write, structure and publish your article
- Enter a clear Post title that matches your topic.
- Write a short introduction in the content area.
- Add subheadings for each main point. Keep paragraphs short and focused.
- Add images with the Image block or the media library.
- In the right sidebar, open the Categories panel and choose a relevant category.
- Add a few descriptive Tags.
- Set a Featured image that represents the post.
- Click Publish and confirm when WordPress asks.
On the Add New Post screen, check the panels on the right. Use the Categories, Tags and Featured image sections before you publish.

To confirm success, open your homepage in a new tab. Your new post should appear at the top of the blog feed with the correct title, image and category.
Step 7: Create menus and set your blog page
Create core pages for navigation
A clear menu helps visitors find their way around your site. Most blogs need at least a Home, About and Contact page. A separate Blog page is also helpful in many cases.
- Go to Pages » Add New and create an About page. Write a short introduction to you and your blog.
- Create a Contact page. Add your contact form using a block or shortcode.
- Optionally, create a blank page titled Blog. This page can hold your posts list.
Set homepage and menus
- Go to Settings » Reading.
- Under Your homepage displays, choose either Your latest posts or A static page.
- If you choose a static page, select one page as Homepage and another as Posts page.
- Click Save Changes.
- Now go to Appearance » Menus.
- Click Create a new menu. Give it a name such as “Main Menu” and click Create Menu.
- Add your Home, About, Blog and Contact pages to the menu.
- Check the box to set this menu as your Primary or Main menu.
- Click Save Menu.
In the Reading settings screen, confirm your homepage and posts page choices before you save. This small check ensures that menu links behave as you expect.

After saving, refresh your homepage. You should see your chosen layout and a top navigation menu. Click each menu link and confirm that every page opens correctly.
Step 8: Configure basic SEO and security
Turn on search visibility and SEO basics
Your blog is now live. Next, you should help search engines find it. Basic SEO settings take only a few minutes and can improve your long term traffic.
- In the dashboard, go to Settings » Reading.
- Check that Discourage search engines from indexing this site is not selected.
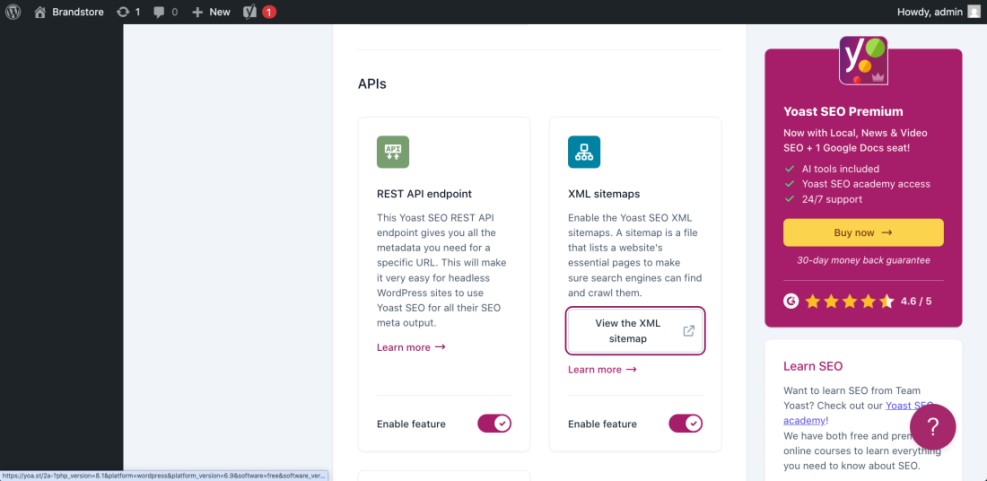
- Go to Plugins » Installed Plugins and find your SEO plugin.
- Run its Configuration Wizard or Setup tool if it has one. This usually enables metadata and sitemaps.
Add backups and security protection
- Install and configure a backup plugin if you have not done so already. Schedule automatic backups to cloud storage or email.
- Set up a security plugin. Turn on firewall rules, brute force protection and basic malware scans.
- Use strong, unique passwords for every admin and editor account.
- Read WordPress Blog Security Basics for more safety tips.
- When you are ready to grow traffic, read New to WordPress Where to Start and plan SEO friendly content.
After you finish these tasks, your blog will be more visible and better protected. Both steps matter, even for a brand new site.
To check your work, search for your domain name in Google after a few days. Confirm that backups run on schedule. Also make sure you receive alerts from your security plugin when it blocks suspicious attempts.
Conclusion: You Are Ready to Go
You have created a WordPress Blog on your own domain. You used shared hosting and a one click installer. You installed a theme, added key plugins and created core pages.
Now you can focus on writing helpful posts for your audience. Over time, you can refine your design and tune performance and SEO. When you start another blog in the future, you can follow this same checklist again and move even faster.