Content Workflows for Multi Author WordPress Blogs
Practical systems for smoother multi author publishing
Content workflows are what keep a multi author WordPress blog from turning into chaos. When many writers, editors, and stakeholders touch the same posts, you need clear stages, handoffs, and tools so every draft moves from idea to published without getting lost.
You will see how to design a simple editorial system, choose the right WordPress tools, and turn that plan into a repeatable workflow. Each section walks through planning, building, and improving your process so your team can publish faster with fewer errors.
Content Workflows Quick Overview
What Is a Content Workflow?
A content workflow is the set of steps your team follows from idea to published article. It defines who does what, in which order, and which tools they use. When those steps are clear, you reduce back-and-forth messages, missed deadlines, and posts that sit in draft forever.
Why Do Multi Author Blogs Need This?
On a multi author site, every post usually touches several hands. Without an agreed workflow, authors guess the next step, editors chase updates, and managers cannot see what is ready. A documented workflow gives everyone the same map, so content keeps moving even when people are busy or change roles.
Key Steps in a Simple Workflow
- Capture ideas and approve the ones that fit your strategy.
- Assign each approved topic to a specific author and deadline.
- Draft, review, and revise until the post meets your quality bar.
- Run SEO and formatting checks, then schedule or publish.
- Monitor results and update important posts over time.
Plan Your Editorial System
Define Roles and Responsibilities
First, decide who owns each step. A small team might only need an editor and a few authors. Larger teams often add a managing editor, SEO specialist, and proofreader. In WordPress, map those responsibilities to roles like Administrator, Editor, Author, and Contributor, or extend them with a role editor plugin if needed.
How Do You Map Workflow Stages?
Next, list the stages a post should pass through. For example, you might track Idea, Assigned, Draft, In Review, Ready for SEO, Scheduled, and Published. When each stage has a clear entry and exit condition, team members always know when their job starts and when it is done.
To choose the right level of detail, compare a basic blog to a busy multi author site. The table below shows how stages can expand as your needs grow.
| Step | Simple Blog | Multi Author Site |
|---|---|---|
| 1 | Draft post | Pitch idea and approve |
| 2 | Edit and proofread | Assign writer with deadline |
| 3 | Publish | Draft and internal review |
| 4 | Share on social | SEO review and fact check |
| 5 | Update later | Schedule, publish, then track performance |
This comparison helps you decide which extra stages you actually need instead of copying someone else’s complex setup that your team will never use.
How Do You Turn Stages Into Rules?
Once stages are clear, write simple rules for each one. For example, an editor might approve ideas, while authors cannot self assign posts above a certain word count. These rules become your editorial guidelines and reduce one-off decisions that slow work down.
Tools for Multi Author Teams
Core WordPress Features to Use
You already have several workflow tools inside WordPress. Post statuses, scheduled publishing, revisions, and comments in the editor all support collaboration. When you train authors to use these features well, you rely less on email threads, spreadsheets, and side chats that are easy to lose.
Which Plugins Help With Editorial Flow?
For more structure, consider plugins that add an editorial calendar, custom statuses, and checklists. Many teams start with an editorial calendar plugin plus a checklist plugin to enforce SEO and formatting standards. In addition, collaboration plugins that add comments or suggestions inside the editor keep feedback in one place.
How Do You Choose the Right Stack?
Start by listing your pain points, such as missed deadlines or unclear handoffs. Then pick plugins that directly address those issues instead of installing every tool you see. For example, if your main problem is seeing what is ready to publish, prioritize calendar and status tools over advanced automation.
Build the Workflow in WordPress
Configure Roles and Permissions in WordPress
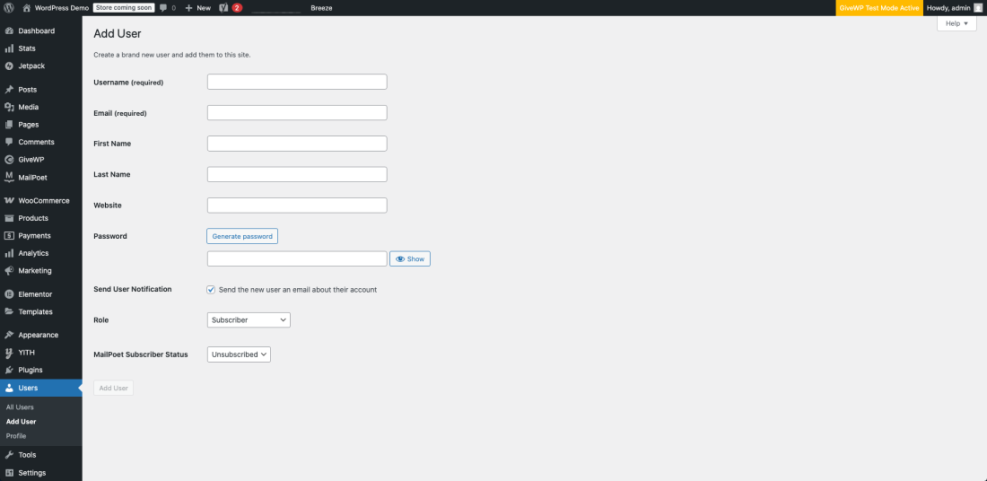
Before changing any content settings, confirm that user roles match your plan. Editors should be able to publish and manage posts, while most authors should not manage plugins or themes. If you need more control, reference the official Roles and Capabilities documentation and use a role editor plugin to fine tune access.
Go to Users » Add New to create or update accounts and assign the correct role to each team member.
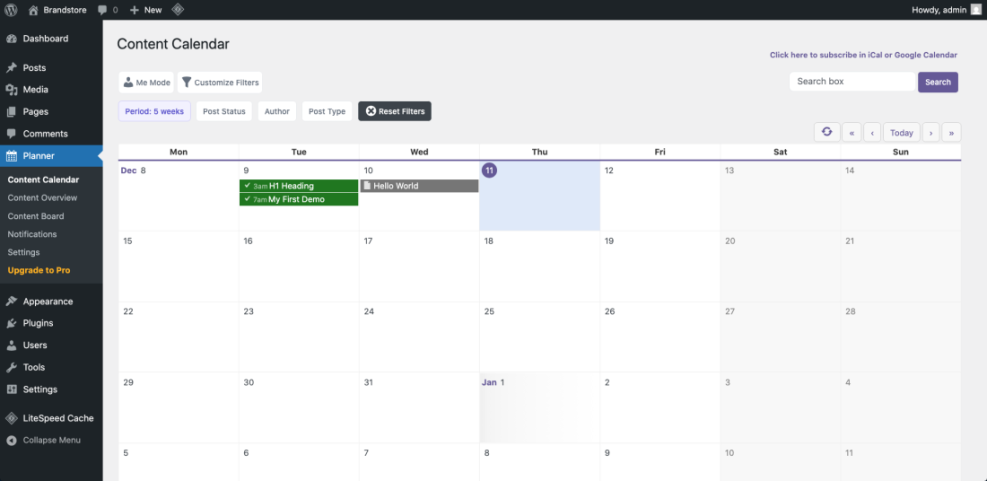
Set Up Statuses, Calendars, and Checklists
Most editorial workflow plugins let you create custom post statuses, such as Pitch, Assigned, or In Review. They also often include a drag and drop calendar view where you can see every post by status and due date. Set up just the statuses that map to your earlier planning work so the interface stays clean.
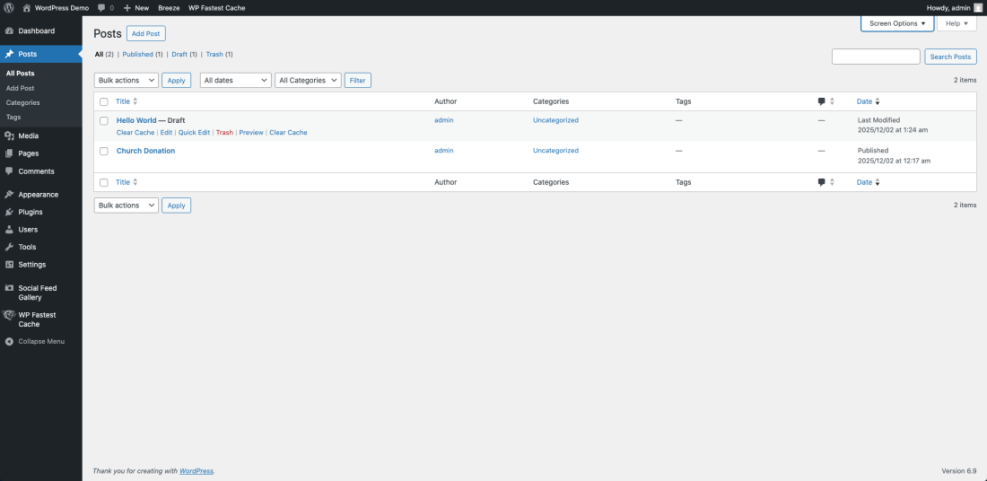
Navigate to Posts » All Posts and filter by your new statuses to confirm that posts move correctly through each stage of the workflow.
How Do You Implement the Workflow Step by Step?
After roles and statuses exist, walk through the workflow with a sample post before inviting the whole team. A quick rehearsal makes gaps obvious while the stakes are low.
- Create a test post and set the first custom status, such as Pitch.
- Assign the post to an author and change the status to Assigned.
- Have the author draft content, then move it to In Review.
- As an editor, leave comments, request rewrites, and switch back to In Progress if needed.
- Run your checklist, add internal links such as a detailed WordPress SEO guide, and set the status to Ready to Publish.
- Schedule the post on the calendar and confirm it publishes on time.
Go to Dashboard » Calendar (or the calendar screen your plugin adds) to confirm your scheduled posts are visible with clear owners and statuses.
Collaboration Quality and Automation
How Do You Keep Authors Aligned?
Clear expectations make collaboration smoother than any tool. Share a short style guide that covers voice, structure, formatting, and SEO basics. Then use editor comments or an internal notes plugin so editors can give targeted feedback inside WordPress instead of long emails that are hard to track.
Open any post in the editor and scroll to the internal notes or comments area your workflow plugin adds.
Use Checklists for Quality Control
Editorial checklists reduce missed steps, especially with new authors. Include items like target keyword usage, internal links, headings, image alt text, and calls to action. When the checklist lives in the editor, writers can self review before sending work to an editor, which saves time for everyone.
- Headline matches the brief and includes the main topic.
- Introduction states the problem and audience clearly.
- Sections follow the agreed heading structure.
- SEO basics and internal links are in place.
- Final readthrough for clarity and tone.
This simple checklist keeps quality consistent even when you add new contributors who are still learning your standards.
Automate Notifications and Repetitive Tasks
Many workflow plugins can send email or Slack alerts when a post changes status. Use these notifications for key handoffs, such as when a draft is ready for review or when a post is scheduled. However, avoid sending alerts for every small change, or people will start to ignore them.
Measure and Improve Your Process
Track Bottlenecks in the Workflow
Over time, pay attention to where posts get stuck. For some teams, drafts pile up waiting for review. For others, published posts never get updated. Regularly scan your editorial calendar and post list by status to see patterns, then adjust deadlines, ownership, or stages to remove friction.
Connect Analytics to Editorial Decisions
Workflow is not only about getting posts out the door. It should also support better decisions about what to publish. Use your analytics tool to track which topics, formats, and authors perform best. Then adjust your idea pipeline, publishing frequency, and update schedule based on those results.
How Often Should You Review the Workflow?
A monthly or quarterly review is enough for most blogs. During that review, revisit your stages, tools, and checklists. Remove steps no one uses, tighten vague guidelines, and add only the changes that solve a real problem that came up during the last cycle.
For more practical examples of how teams refine their systems, you can also study in depth editorial workflow tutorials like the guides from WPBeginner or PublishPress, then adapt only the parts that fit your site’s size and goals. WPBeginner’s multi author workflow tutorial and the PublishPress publishing workflow guide are both solid starting points.
Content Workflows Conclusion
Turn Your Workflow Into a Habit
A content workflow only works when everyone follows it every day. Start by rolling out the process on new posts, then gradually move older drafts into the new system. When someone bypasses a step, treat it as a chance to improve the workflow or the training, not as a reason to abandon the structure.
Next Steps for Your Team
Choose one or two immediate changes you can make this week, such as adding clear custom statuses or introducing an editorial calendar. Then schedule a brief training call where you walk through a real post from pitch to publish inside WordPress. This shared walk through turns your written workflow into a living practice.
Finally, keep your workflow document short, easy to find, and easy to update. When your team sees that it reflects how they really work, not just a static policy, they will keep using and improving it instead of ignoring it.
More WordPress Guides You Might Like
Once your content workflows feel stable, you can strengthen related areas like SEO, theme choices, and broader strategy. These guides and planned resources will help you deepen your WordPress skills.
- Best Free WordPress Blog Themes
- Best WordPress SEO Plugins and Tools
- WordPress Guides & Tutorials Overview
- How to build a website on WordPress
- Best contact form plugins for WordPress
Use these resources to refine your tooling, improve discoverability, and support your team with clear, opinionated guidance on the parts of WordPress they touch most often.