Content Planning Workflow for WordPress Blogs
Step by step blueprint for consistent, SEO ready posts
Content planning workflow for WordPress blogs is what keeps your ideas organized and your posts publishing on time. Without a clear process, you end up with random drafts, missed opportunities, and uneven traffic that makes your blog hard to grow.
You are going to build a simple, repeatable workflow that turns ideas into optimized posts on a predictable schedule. Step by step, you will define goals, plan topics, use WordPress to manage stages, and track results so your content supports your business instead of draining your energy.
Content Planning Workflow Quick Overview
What Is a Content Workflow?
A content workflow is the repeatable path every post follows from idea to update. It usually moves through stages like research, drafting, editing, optimization, approval, scheduling, and promotion. When you define these steps clearly, you reduce stress, avoid bottlenecks, and make publishing feel predictable instead of chaotic.
Main Stages at a Glance
For most WordPress blogs, a practical workflow includes these core stages:
- Define goals and audience.
- Collect and prioritize topic ideas.
- Do keyword and SERP research for each idea.
- Draft a content brief and outline.
- Write, edit, and fact check the post.
- Optimize for on page SEO and internal links.
- Prepare media, featured image, and formatting.
- Schedule in a calendar and publish.
- Promote, measure, and add follow up tasks.
When every post moves through the same steps, you can see where work is stuck and decide what to improve first.
Clarify Goals and Audience First
Why Do You Need Clear Goals?
Clear goals keep your workflow focused on results instead of random output. For example, you might want more email subscribers, more product sales, or more search traffic for a service page. Each goal points you toward different topics, formats, and calls to action in your posts.
How Do You Define Your Audience?
First, describe one ideal reader as if you were talking about a real person. Include their job, main problem, and what they want your blog to help them achieve. Then, write down the questions they type into Google and the phrases they use on sales calls or support tickets.
Map Goals to Content Types
Next, connect each goal to specific content types. Tutorials and how to posts work well for search traffic. Case studies and comparisons often support sales. Opinion pieces and stories can build trust. When you know which type supports which goal, you can balance your calendar instead of publishing only what feels fun.
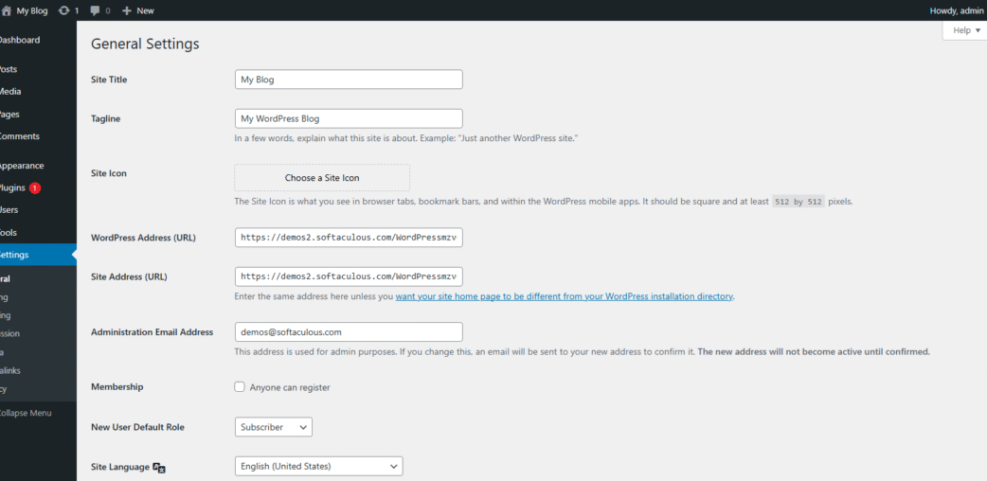
From the WordPress Dashboard, go to Settings then General and review your Site Title and Tagline so they match your audience and promise.
Build a Strategic Topic Backlog
How Do You Find Content Gaps?
Start by listing the top questions you hear from readers and customers. Then, search your own site to see which questions you already cover and where you only mention them briefly. Afterwards, compare that list with keyword research to find topics that have demand but no strong article on your blog yet.
Build Topic Clusters Around Themes
Group related ideas into clusters around one main theme, such as “beginner WordPress setup” or “small business SEO.” Then, plan one in depth pillar page and several supporting posts that link together. This structure helps readers dive deeper and gives search engines a clear picture of your authority on the topic
Prioritize Ideas by Impact and Effort
To keep momentum, score each idea by potential impact and required effort. High impact, low effort ideas are your first priority. In contrast, high effort ideas with low impact should move to the bottom of your backlog. This simple filter prevents you from spending weeks on posts that bring little value.
For deeper SEO planning, you can reinforce this stage by reviewing the keyword research tools guide and choosing one tool you will use for every new topic.
Turn Ideas into a WordPress Calendar
Set Up a Practical Editorial Calendar
Once you have a backlog, you need a calendar that shows what is coming next. You can start with a simple monthly view that assigns one main post per week. Then, add smaller supporting posts or updates around that core piece so each week has a clear priority.
What Tools Help with Scheduling?
You can use a spreadsheet, a project tool, or a dedicated editorial calendar plugin. Inside WordPress, plugins such as Editorial Calendar let you drag posts on a calendar, see statuses, and quickly fill empty weeks. In addition, they reduce the chance of accidentally publishing two big posts on the same day.
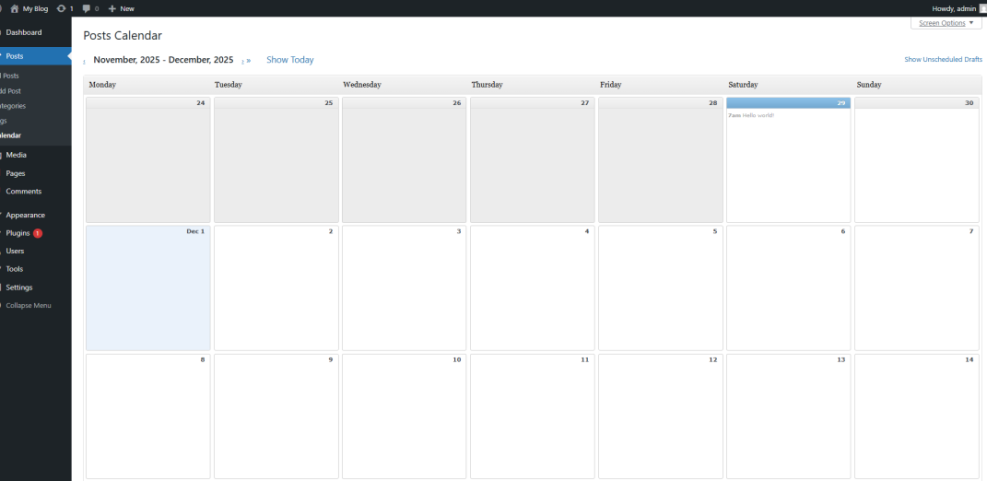
From the Posts menu, choose All Posts, then open your calendar view if your chosen plugin adds that screen.
Use Statuses to Track Progress
WordPress supports basic states like Draft, Pending Review, and Published. However, you can create additional markers with categories, tags, or custom fields. For example, you might tag posts as “Brief Ready,” “Writing,” or “Needs Images.” This simple structure makes it easy to see where each post sits in the workflow.
If you prefer a visual monthly layout, consider testing the free Editorial Calendar plugin, which adds a drag and drop calendar view directly inside your WordPress dashboard.
Create a Reusable Post Template
Outline Every Post the Same Way
A consistent outline reduces decision fatigue and helps new writers ramp up quickly. For example, you might always start with a short problem focused intro, then give a quick answer, followed by deeper steps, examples, and a clear call to action. Over time, your regular readers will recognize and trust this structure.
On Page SEO Checklist
Before you publish, move through the same on page SEO checklist every time. Include one clear focus keyword, a compelling title, a descriptive meta description, scannable headings, and descriptive alt text for images. Additionally, add a few internal links to related posts and at least one link to an external, authoritative resource.
- Confirm one focus keyword and search intent.
- Write a keyword aligned title and meta description.
- Structure headings and subheadings for easy scanning.
- Add relevant internal and external links.
- Compress images and set descriptive alt text.
- Preview on mobile and desktop before scheduling.
Using the same checklist for every post keeps quality high while reducing the number of last minute fixes before publishing.
From the Posts menu, click Add New and focus on the right sidebar fields for Categories, Tags, and Featured image as you apply your template.

When you want a deeper dive into optimization details, you can review the WordPress SEO guide and adapt the recommendations into your own checklist.
Collaborate and Automate Inside WordPress
Assign Roles and Permissions
If you work with a team, you should map each stage of the workflow to a role. Authors might draft and revise content, while editors review, improve structure, and approve for publishing. Meanwhile, site admins can focus on maintaining plugins, performance, and security instead of editing copy.
Use Workflow Plugins Carefully
There are plugins that add advanced approval flows, custom statuses, and content syncing with external tools. However, every new plugin adds complexity and can slow down your site. Start with built in WordPress roles, plus a simple calendar plugin, before you add heavier workflow tools that might overlap with your existing processes.
Standardize Handoffs Between Stages
For smoother collaboration, write down what “done” means for each stage. A draft is done when headings are in place, images are suggested, and links are noted. An optimized post is done when the checklist is green. Therefore, you avoid situations where a writer calls a post finished but an editor finds missing pieces.
Measure Results and Improve Workflow
Which Metrics Should You Track?
You do not need a complex dashboard to improve your workflow. Start with a few simple metrics: organic traffic per post after several weeks, time on page, and conversions such as email signups or product clicks. Over time, you can see which content formats and topics move these numbers in the right direction.
Turn Insights into New Ideas
When a post performs well, ask why it worked. Maybe the topic matched a strong keyword, the headline resonated, or the tutorial included unique screenshots. Then, plan follow up content that goes deeper, answers related questions, or updates the post with new sections so it continues to earn traffic and conversions.
In your analytics tool, open the report for Acquisition then Organic Search and filter to your blog directory to see which posts bring the most search traffic.
Refine the Workflow Itself
Every few months, review how your team actually works compared to the process you documented. If a step never gets done, decide whether to remove it or make it easier. If a step always causes delays, break it into smaller tasks or give one person clear ownership so it does not stall the whole calendar.
Content Planning Workflow Conclusion
A solid content planning workflow for WordPress blogs turns publishing from a scramble into a system. You now have the pieces to connect goals, topics, SEO, and collaboration so posts move smoothly from idea to update. The next step is simple: choose one stage that feels messy today and improve that part before touching anything else.
As you refine your workflow, remember that consistency matters more than perfection. When you reliably publish helpful, optimized posts on a clear schedule, your traffic grows, your readers trust you more, and your blog becomes a real asset to your business instead of a side project you handle only when you have extra time.
More WordPress Guides You Might Like
To deepen your content planning skills and round out your blog toolkit, these resources will help you with topics that connect directly to your workflow, from strategy to design.
- Best Keyword Research Tools for SEO
- How to build a website on WordPress
- Content briefs WordPress writing
Use these guides as next steps when you want to upgrade your themes, sharpen your SEO research, or expand the editorial systems that support your content planning workflow.