How To Configure Google Analytics For WordPress
Step by step GA4 tracking guide for your site

Analytics Setup in WordPress can feel confusing when you first try to connect Google Analytics. You see tracking codes, plugins, and data streams, and it is not always clear which option is right for your site.
You are going to learn how to configure Google Analytics 4 (GA4) for WordPress in a clean, future-proof way. The guide walks you through preparing your Analytics account, choosing the best connection method, adjusting key GA4 settings, and testing that everything tracks correctly.
Quick Analytics Setup Steps
If you only need the short version, you can connect GA4 to WordPress with a few clear actions. These steps work for most standard websites and blogs.
What Are The Basic Steps?
- Sign in to your Google Analytics account or create one.
- Create a GA4 property and a Web data stream for your site.
- Copy your Measurement ID (it starts with “G-”).
- Install a connection method in WordPress, such as Site Kit or a GA plugin.
- Paste the Measurement ID or complete the plugin’s onboarding.
- Open the Realtime report in GA4 and confirm visits appear.
Once these steps are complete, GA4 starts recording visitors, pages, and events as people browse your site.
When Should You Use A Plugin?
You should use a plugin when you want an easier Analytics Setup, automatic updates, and reports inside your dashboard. A plugin also helps avoid mistakes when your theme changes. However, developers sometimes prefer manual code or Google Tag Manager in WordPress explained in simple terms: what it means, why it matters for performance, SEO and UX, and where you will see it in daily work.”>Tag Manager for more advanced control.
Which Method Is Safest For Beginners?
For most beginners, Google’s free Site Kit plugin is the safest choice. It guides you through the Google sign-in flow, connects Search Console and Analytics together, and adds the tracking tag correctly. You avoid editing code and can see basic stats right inside WordPress.
Preparing Your Analytics Account
Before you touch WordPress, you need a working GA4 property. This is where all your website’s data will live.
Create Or Sign In To Analytics
First, visit the Google Analytics website and sign in with your main Google account. If you have never used Analytics, you will be guided through a simple account creation wizard. Choose an account name, accept the data sharing terms, and continue to property setup.
How Do You Create A GA4 Property?
To create a GA4 property, enter a property name, set your reporting time zone, and pick your currency. Then, select the “Web” option when you create a data stream and paste your site URL. The wizard generates a Measurement ID and installs GA4 on the property so you can collect web data.
Find Your Measurement ID Or Tag
In GA4, open Admin, click Data streams, and select your website stream. You see your Measurement ID in the top right. You can also open the tag instructions, which show options for installing the Google tag with a CMS, a website builder, or manual code.
Linking Analytics And WordPress
Now you are ready to actually connect GA4 to your WordPress site. There are three main methods that cover almost every use case.
Should You Use A Plugin Or Code?
Most site owners should use a plugin, because it handles updates, adds the tag in the correct place, and avoids mistakes when themes change. Manual code or Google Tag Manager make more sense when you need complex event tracking, multiple tags, or work closely with a developer.
The table below compares the three common integration options so you can choose quickly.
| Method | Best For | Pros | Cons |
|---|---|---|---|
| Site Kit by Google | Beginners and small sites | Easy setup, official plugin, adds Search Console too | Fewer advanced tracking options |
| Dedicated GA plugin | Bloggers and marketers | Nice dashboards, extra reports, simpler event tracking | Another plugin to maintain, possible upsells |
| Manual code / Tag Manager | Developers and power users | Maximum flexibility, works across many platforms | More complex, higher risk of mistakes |
Once you decide on a method, you can follow the matching step-by-step process below.
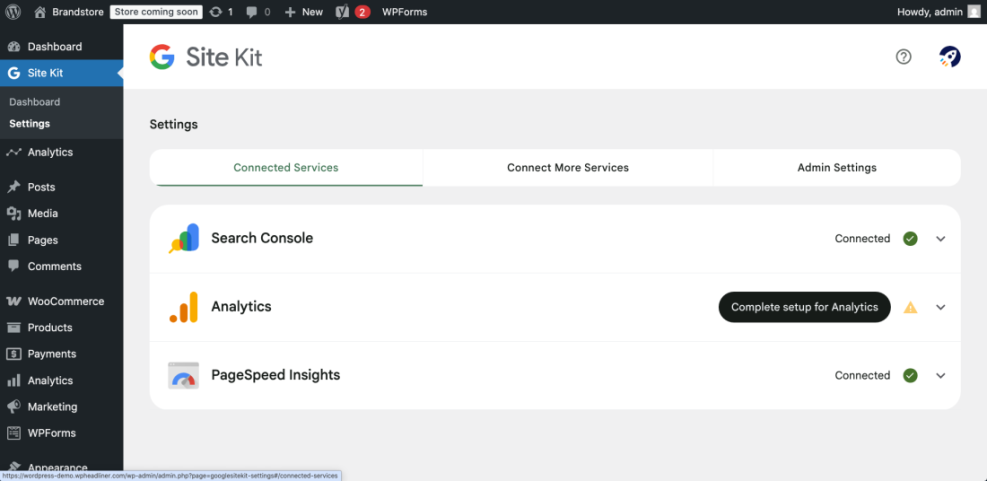
Connecting With Site Kit By Google
In your WordPress Dashboard, go to Plugins » Add New and search for “Site Kit by Google.” Install and activate the plugin, then click the new Site Kit menu and follow the setup wizard to connect your Google account and Analytics property.
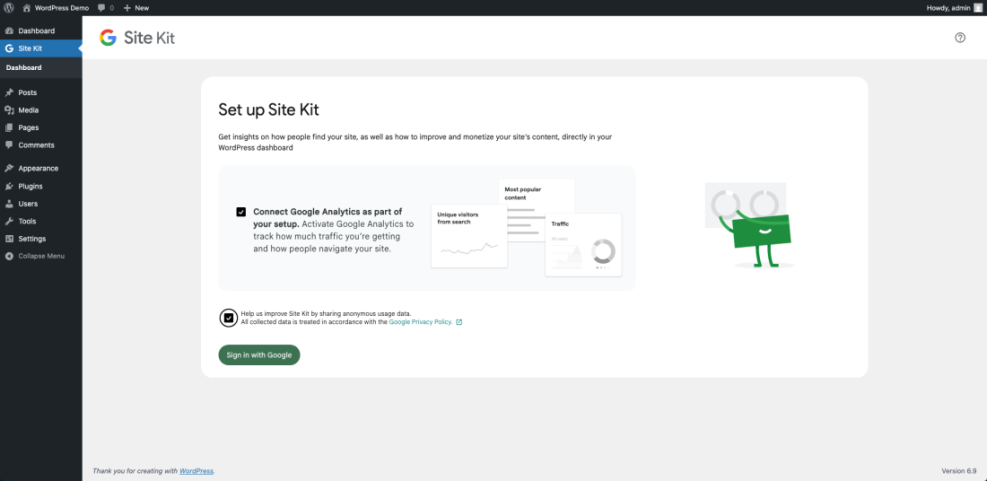
During the wizard, check the option to connect Google Analytics. Site Kit will either create a new GA4 property or let you choose an existing one. After authorization, it automatically adds the Google tag to your site without editing any code.
Connecting With A Dedicated Analytics Plugin
In your WordPress Dashboard, open Plugins » Add New and search for your preferred Analytics plugin. Install and activate it, then open its settings page, which usually appears under a menu like Analytics or Insights.
Most plugins ask you to either sign in with Google or paste your Measurement ID. Follow the plugin’s wizard, save changes, and confirm that it reports connected status. For a broader SEO toolkit that pairs well with Analytics, check out WordPress SEO – Complete Beginner’s Guide.
Using Manual Code Or Tag Manager
If you prefer direct code, copy the Google tag snippet from your GA4 stream and paste it into your theme’s header.php file just before the closing </head> tag, or use a header/footer code manager plugin. Advanced users may instead place the tag in Google Tag Manager and install only the Tag Manager container in WordPress.
Key GA4 Settings Worth Configuring
Once GA4 collects data, you should adjust a few settings so the reports stay useful and privacy friendly.
Turn On Enhanced Measurement
Enhanced measurement automatically tracks scrolls, outbound clicks, site search, file downloads, and more. In your GA4 property, open Admin » Data streams, select your stream, and ensure the Enhanced measurement toggle is on. You can disable individual events if they do not match your goals.
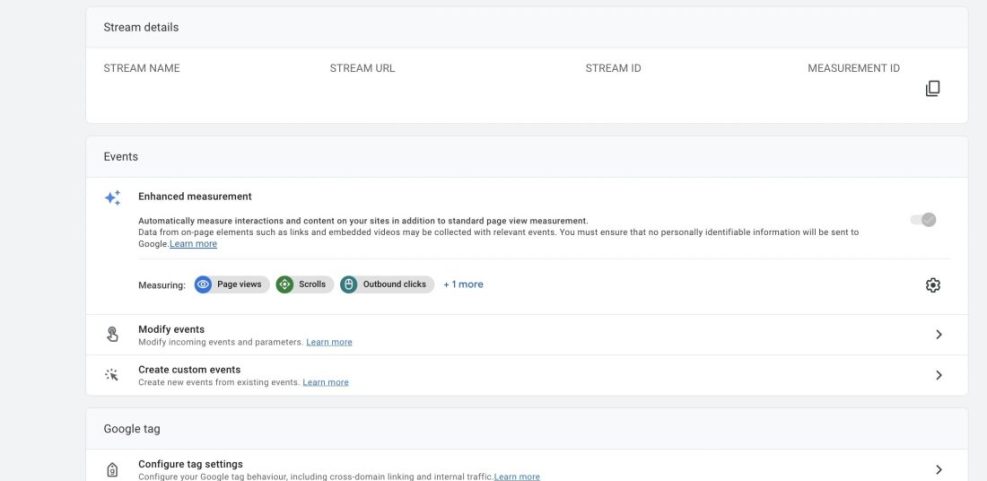
These automatic events give you deeper insight without writing custom code. They are especially helpful for blogs that rely on engagement and downloads.
Adjust Data Retention And Privacy
In GA4, open Admin » Data settings » Data retention. You can choose how long to store user-level data for exploration reports. Shorter retention supports stronger privacy, while longer retention helps you analyze trends. You should also review IP masking, location data, and consent features to align with your audience and policies.
Track Key Conversions And Events
To mark important actions as conversions, open Admin » Events and toggle key events like generate_lead or purchase. For sign-ups, contact forms, or downloads that do not track automatically, you can create custom events or set them up through your plugin.
For stores, you may later want deeper ecommerce tracking. When you are ready, you can follow a dedicated guide such as GA4 Ecommerce Tracking to capture revenue and product data.
Testing And Troubleshooting Tracking
After you connect GA4 to WordPress, you should always test tracking. This prevents days or weeks of missing data.
How Do You Check If GA4 Works?
To test GA4, open an incognito browser window and visit your site. Then, in GA4, go to the Realtime report and confirm at least one active user appears. Click a few pages and events, and check that they show under “Views by page title” or “Event count by event name.” If you see activity, tracking is working.
Common Tracking Issues In WordPress
Sometimes caching plugins, aggressive performance settings, or security rules block the Analytics tag. If you do not see Realtime data, clear your caching plugin and CDN, then test again. Also make sure you did not paste the tag twice or leave an old Universal Analytics code active in your theme.
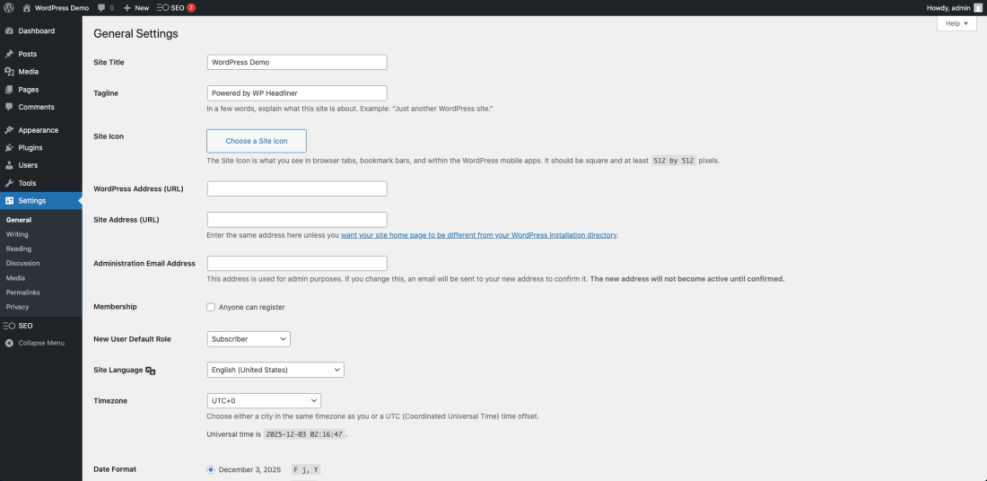
In your WordPress Dashboard, go to Settings » General and verify that the site URL matches the URL you used in GA4. Mismatched URLs often explain why data appears under a different domain or not at all.
Ongoing Health Checks
Periodically open GA4’s Realtime and main Reports overview to confirm data still flows. Review traffic spikes that seem too good to be true, because they may come from bots or test traffic. You can filter your own visits by creating internal traffic rules or using a browser profile that blocks your Analytics tag.
For broader speed and stability improvements that support clean data, you may also want to read WordPress Performance Speed Optimization.
Analytics Setup Conclusion
Accurate Analytics data turns your WordPress site from a guessing game into a measurable system. Once GA4 is installed correctly and tuned with conversions, you can make smarter decisions about content, design, and marketing. Your next step is to log in weekly, review your key reports, and adjust your strategy based on real behavior.
If you want to go further, consider building custom audiences, adding ecommerce events, or pairing GA4 with a strong SEO plugin. Over time, this combination helps you understand not just who visits, but why they convert, and which changes move your business forward.
More WordPress Guides You Might Like
If you want to deepen your understanding of SEO and measurement around WordPress, these resources are a helpful next step.
- Best WordPress SEO Plugins and Tools
- Best Rank Tracker Tools for SERP Tracking
- WordPress Guides & Tutorials Overview
- WordPress seo complete beginners guide
- Analytics setup WordPress google analytics
Use these guides to expand from basic visitor tracking into full-funnel optimization, including better SEO, cleaner data, and more reliable conversion insights.