Beginner WordPress Security Best Practices Guide
Beginner friendly steps to protect your WordPress site
WordPress security can feel overwhelming when you are just starting your first site, but it does not have to be complicated. In this guide you will follow practical best practices that protect your login, files, database, and visitors without needing to be a developer.
By the end of this tutorial you will have a simple security checklist that covers strong logins, two factor authentication, safe updates, backups, and monitoring so your WordPress site stays online and trustworthy.
What You Need to Start
- Administrator access to your WordPress dashboard.
- Access to your web hosting control panel or SFTP account.
- Ability to install and update WordPress plugins.
- A reliable backup plugin already configured or ready to set up.
- Basic familiarity with navigating the WordPress admin menu.
Step 1: Secure the Login Page
Your login page is the front door of your WordPress site, so you must make it difficult for attackers to guess credentials or brute force their way in.
- Log in to your dashboard and go to Users » All Users.
- Edit each administrator user and set a long password using the built in Update Profile tool.
- Click Update Profile to save the new password.

- Install a login protection or security plugin from the official WordPress.org plugin directory.
- In your dashboard navigate to Settings » Discussion and confirm that user registration is disabled unless you really need it.
- Use your security plugin to limit login attempts for failed logins from the same IP address.
To verify success, try entering a wrong password multiple times and confirm that the login page eventually shows a lockout message or delay.
Step 2: Turn On Two Factor Authentication
Two factor authentication adds an extra one time code to your password, making it almost impossible for attackers to log in even if they somehow know your password.
- From the dashboard go to Plugins » Add New.
- Search for a trusted two factor plugin that supports authenticator apps.
- Click Install Now and then Activate.
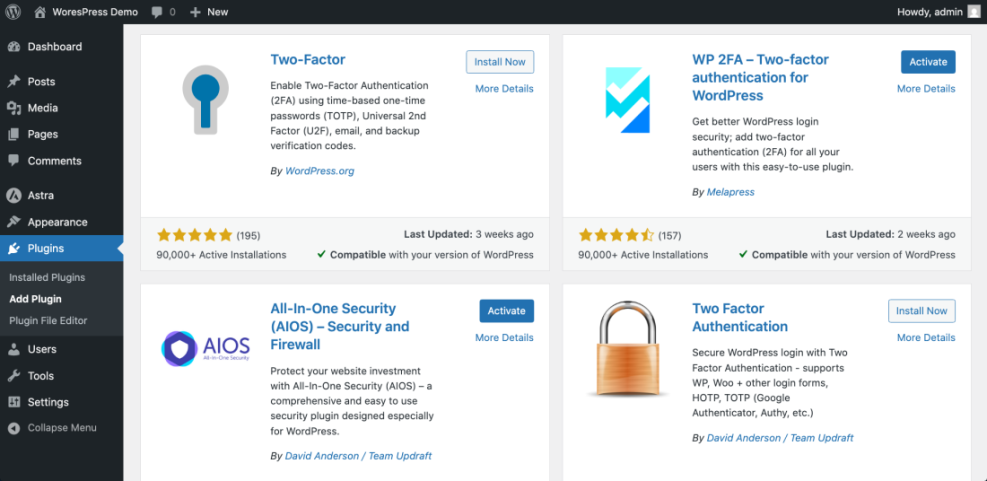
- After activation look for a new Two Factor or Security menu item in your dashboard.
- Follow the plugin wizard to scan the QR code with your mobile authenticator app and confirm the generated code.
- Enable two factor authentication at least for all administrator and editor accounts.
Log out and log back in to verify that WordPress now asks for a one time code after you enter your username and password.
Step 3: Keep Core Themes and Plugins Updated
Most WordPress hacks exploit old versions of core, themes, or plugins, so staying updated is one of the most important security best practices.
- In your dashboard go to Dashboard » Updates.
- Check the versions for WordPress core, Plugins, and Themes.
- Click Update Now for WordPress if a new version is available.
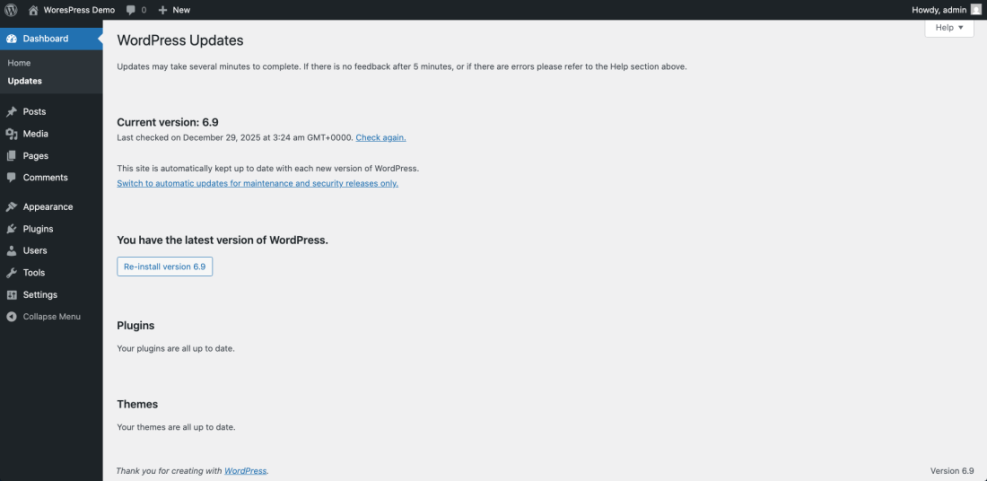
- Scroll down and select all trusted plugins you actively use, then click Update Plugins.
- Switch to Appearance » Themes and delete any themes you no longer use, keeping just one default theme as a fallback.
- Enable automatic minor updates in your security or management plugin if you want background security updates.
Verify success by making sure the Updates page shows “Your WordPress install is up to date” and no critical updates remain.
Step 4: Add a Security Plugin and Firewall
A well configured security plugin adds firewall protection, malware scanning, and alerting on suspicious activity without requiring manual code changes.
- Navigate to Plugins » Add New in your dashboard.
- Search for a reputable security plugin that supports firewall rules, malware scans, and login hardening.
- Click Install Now, then Activate.
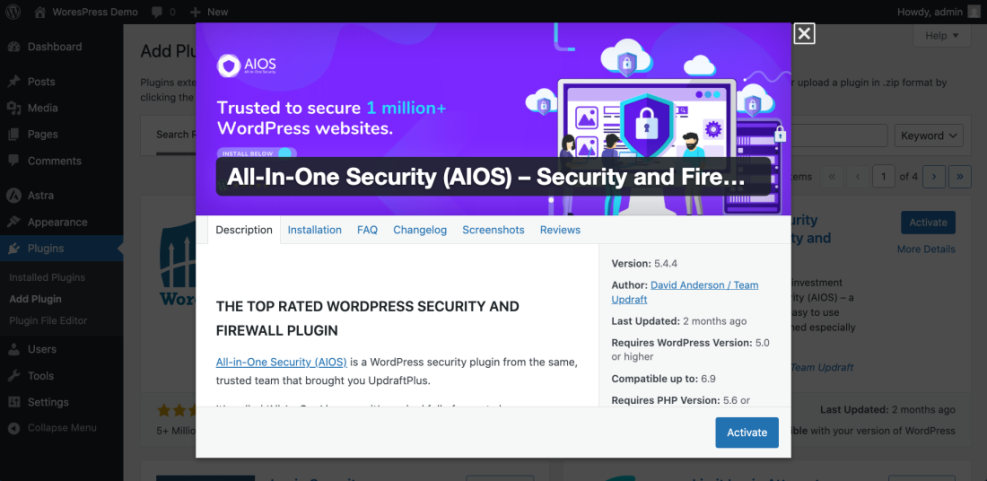
- Open the new Security menu in your dashboard.
- Run any built in configuration wizard to apply recommended firewall and hardening settings.
- Schedule regular malware scans and configure email alerts for critical issues.
To confirm everything works, run a manual scan and verify that it completes without errors and that the firewall status shows as active or enabled.
Step 5: Harden WordPress Configuration and File Editing
Hardening blocks common attack paths by disabling risky features and enforcing secure connections at the configuration level.
- Connect to your site via SFTP or use your host’s File Manager.
- Locate the wp-config.php file in the root of your WordPress installation.
- Download a copy of the file to your computer before editing.
Add the following lines near the bottom of wp-config.php, just above the comment that says “That’s all, stop editing”:
define( 'FORCE_SSL_ADMIN', true );
define( 'DISALLOW_FILE_EDIT', true );- Upload the edited wp-config.php back to your server, replacing the existing file.
- Log in to your WordPress dashboard and confirm that the URL uses https and that Appearance » Theme File Editor is no longer available.
Step 6: Configure Automatic Backups and Test Restores
Reliable backups protect you from human error, failed updates, and hacks, and are a critical part of any WordPress security best practices checklist.
- In your dashboard go to Plugins » Installed Plugins.
- Locate your backup plugin or install one if you do not have one yet.
- Open the plugin’s Settings page.
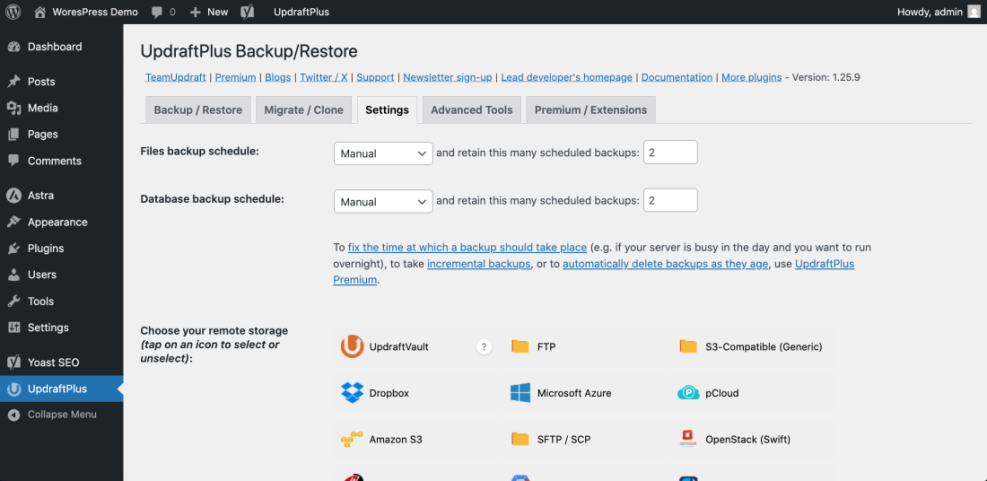
- Set a backup schedule that matches how often your content changes, for example daily or weekly.
- Configure remote storage such as cloud storage instead of only keeping backups on the same server.
- Run a manual backup now and download a copy to verify it completes successfully.
Once a month, perform a test restore on a staging or test site to confirm that your backups are usable and complete.
Step 7: Set Up Monitoring and Alerts
Monitoring helps you detect problems early by sending alerts when your site goes down, files change unexpectedly, or suspicious logins occur.
- Open your security plugin dashboard and look for Notifications or Alerts settings.
- Enable email alerts for failed login lockouts, file changes, and malware detections.
- Confirm that the notification email address goes to an inbox you check regularly.
- Set up an uptime monitoring service and point it to your home page URL.
- Configure alert thresholds for downtime and slow response times.
- Save your settings and trigger a test alert if the service supports it.
Verify that you receive a test email from both your security plugin and uptime monitor so you know alerts will reach you when something goes wrong.
Step 8: Create a Simple Monthly Security Routine
A short recurring checklist keeps your WordPress security strong over time without taking hours each week.
- Add a recurring reminder to your calendar once a month labeled “WordPress security review”.
- On that day, log in and review Dashboard » Updates for new updates.
- Check your security plugin dashboard for recent alerts or blocked attacks.
- Confirm that your latest backup is less than a week old and stored offsite.
- Spot check your site on both desktop and mobile to ensure everything looks normal and loads over https.
- Document any changes you make so you can trace issues back to specific dates if necessary.
Conclusion You Are Ready to Go
You have now implemented the most important beginner friendly WordPress security best practices, including strong logins, two factor authentication, safe updates, hardening, backups, and monitoring.
Keep following your monthly security routine and refine it as your site grows. If you later need deeper protection, you can build on this foundation with more advanced hardening, audits, and developer support.
Further Reading
- Beginner WordPress security best practices guide
- WordPress security complete overview
- Install WordPress step by step
- How to start a blog WordPress
- Beginner WordPress security best practices guide