The canonical tag in WordPress tells search engines which version of a URL is the preferred one, so duplicate pages do not compete in search results. When you add a clear canonical tag, you consolidate link equity, avoid duplicate content issues, and keep your rankings focused on the right page.
In this tutorial you will learn how to add canonical tags in WordPress using popular SEO plugins and simple code. By the end, you will be able to choose a preferred URL for each important page, prevent common mistakes, and verify that your canonical setup is working correctly.
What You Need to Start Before Adding a Canonical Tag in WordPress
- Administrator access to your WordPress dashboard so you can configure the canonical tag in WordPress settings.
- An installed SEO plugin such as Yoast SEO or Rank Math, or access to your theme files via FTP or your hosting file manager to output the rel=”canonical” tag.
- A list of pages and posts that may be duplicates or very similar in content and might require a WordPress canonical tag.
- A recent site backup created with a reliable backup plugin or following your Beginner guide to WordPress speed optimization.
Step 1: Plan Your Canonical URLs in WordPress
Choose a Primary URL for Each Topic
Before you add any canonical tag in WordPress, decide which URL you want search engines to treat as the main version. Careful planning first prevents you from pointing multiple pages at the wrong URL or creating loops with your canonical URLs.
- List all pages and posts that target the same keyword or show very similar content and might need a shared canonical URL in WordPress.
- For each group, choose one primary URL that is the most complete, up to date, and useful.
- Mark the other URLs in the group as secondary pages that will point to the primary URL via the canonical tag.
- Log in to your WordPress dashboard by visiting
/wp-admin/and entering your administrator credentials.
Prepare a Simple Canonical Mapping List
To verify this step, confirm that each primary URL is unique and that no two pages are competing for the exact same query in your content plan. Doing this now makes it easier to apply the correct WordPress canonical tag later and avoid confusion when you set the canonical URL inside your SEO plugin.
Step 2: Add Canonical Tag in WordPress with Yoast SEO
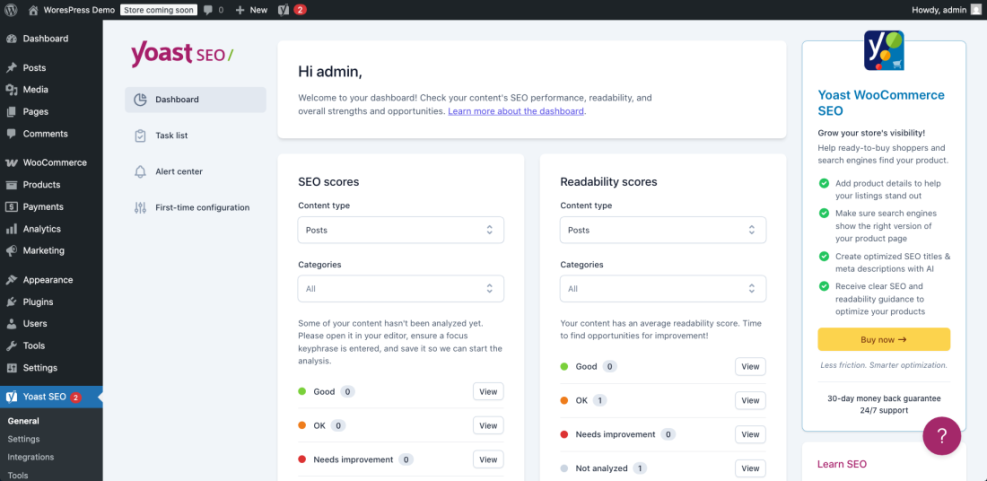
Yoast SEO automatically adds a self-referencing canonical tag in WordPress on most pages, but you can override it when you have duplicates. This method is ideal if you already use Yoast to manage your titles and meta descriptions.
Check That Yoast SEO Is Active
- In the WordPress dashboard, navigate to Plugins » Installed Plugins and confirm that Yoast SEO is active so it can output the default canonical URL.
- If Yoast is not installed, follow the steps in How to Install WordPress Plugin to add and activate it.
Set the Canonical URL with Yoast SEO
- Navigate to Posts » All Posts or Pages » All Pages and open the secondary URL you want to point at a primary page using a canonical tag.
- Scroll below the editor to find the Yoast SEO meta box.
- Click the Advanced tab (gear icon) inside the Yoast SEO box.
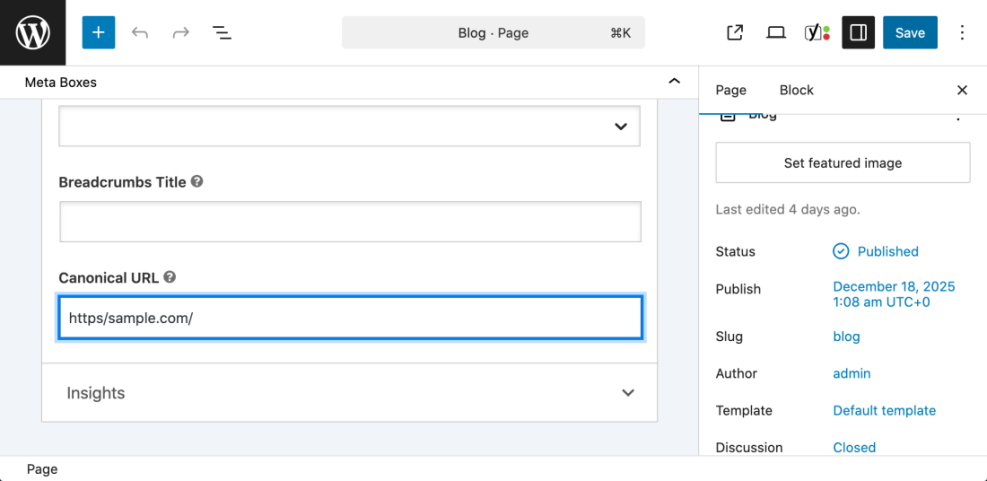
- Locate the field labeled Canonical URL.
- Paste the full primary URL you chose in Step 1, including https and the trailing slash if your site uses it. This URL will become the canonical tag in WordPress for the current page.
- Click Update to save the post or page.
Double-Check the rel=canonical Tag in the Source Code
To verify the canonical tag, open the updated page on the front end, right-click and choose View Page Source, then press Ctrl + F (or Cmd + F on Mac) and search for rel="canonical". Inside the source code you should see a single canonical tag pointing to your chosen primary URL and no duplicate canonical tags on that page.
Step 3: Add Canonical Tag in WordPress with Rank Math SEO
Rank Math SEO also adds default canonical tags in WordPress and lets you override them per page. Choose this step if Rank Math is your main SEO plugin instead of Yoast.
Enable Rank Math and Open the Page
- From the dashboard, go to Plugins » Installed Plugins and confirm that Rank Math SEO is active.
- Navigate to Posts » All Posts or Pages » All Pages and open the secondary page that should point to a primary URL using a custom canonical tag.
- On the right-hand side of the editor, find the Rank Math SEO panel and click it to expand.
Configure the Canonical Tag in Rank Math
- Click the Advanced tab inside the Rank Math panel.
- Locate the field labeled Canonical URL.
- Enter the full primary URL you planned in Step 1. That URL will become the canonical tag in WordPress for that page.
- Click Update to save the changes.
Confirm Rank Math Output in the HTML Head
Next, view the page source and search for rel="canonical". The rel=canonical tag should now show the primary URL you set, not the page’s own URL. If you see more than one canonical tag, remove overlapping plugins or custom code until only a single canonical remains.
Step 4: Add a Canonical Tag in WordPress with Simple Code
If you prefer not to use an SEO plugin, or you are building a custom theme, you can output canonical tags in WordPress with a small PHP function. This method is more technical and should be used carefully.
Prepare Your Theme for Custom Canonical Tags
- Ensure you are using a child theme so your changes are not lost during updates.
- Open your child theme’s functions.php file using the Theme File Editor under Appearance » Theme File Editor, or via FTP/file manager.
- Add the following function near the bottom of the file, above the closing PHP tag if one exists. The function will generate a basic canonical tag in WordPress for singular content.
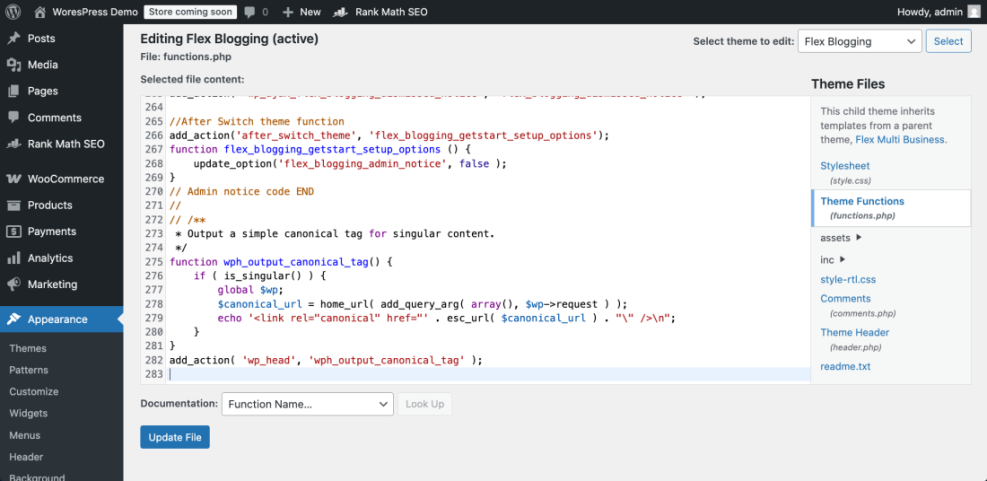
Add the PHP Function That Outputs the Canonical Tag
/**
 * Output a simple canonical tag for singular content.
 */
function wph_output_canonical_tag() {
    if ( is_singular() ) {
        global $wp;
        $canonical_url = home_url( add_query_arg( array(), $wp->request ) );
        echo '<link rel="canonical" href="' . esc_url( $canonical_url ) . "" />n";
    }
}
add_action( 'wp_head', 'wph_output_canonical_tag' );
- Click Update File to save the changes.
Test the Custom Canonical Tag in Your Browser
To verify success, view any single post or page, open the page source, and confirm that a <link rel="canonical" ...> tag appears in the <head> section with the correct URL. This final check confirms that your custom code is adding the canonical tag in WordPress correctly and consistently across singular pages.
For more background on core functions that power the WordPress canonical tag, you can also review the rel_canonical() reference in the official WordPress developer documentation.
Step 5: Verify Canonical Tags in WordPress and Fix Issues
After you set canonical tags in WordPress, always check that each important URL has exactly one canonical tag and that all secondary pages point to the correct primary URL. This practice prevents conflicting signals and helps search engines index your content reliably.
Manual Checks in the Browser
- Open each primary page in your browser and view the page source.
- Search for
rel="canonical"and confirm the canonical URL matches the page’s own URL. This should be a self-referencing canonical tag in WordPress. - Open each secondary page and confirm its canonical tag points to the primary URL you chose in Step 1.
- Use an SEO crawler or browser extension to quickly list canonical URLs in WordPress across your site.
- Update any incorrect URLs and remove extra plugins or code that may be adding duplicate canonical tags.
Use Tools and Maintenance Workflows to Catch Canonical Issues
Depending on how you manage your WordPress maintenance, there are different ways to keep canonical and title issues under control so your canonical tags in WordPress continue to work properly over time:
| Method | Where You Use It | Main Purpose |
|---|---|---|
| DIY Manual Maintenance | WordPress dashboard and hosting control panel | Maximum control over updates, theme and plugin changes, and manual checks for canonical tags in WordPress and title issues on small or low-risk sites. |
| Managed Hosting Tools | Your host’s control panel or custom dashboard | Simplify routine maintenance with one-click updates, built-in backups, and basic monitoring so template problems that break the canonical tag in WordPress are less likely to appear. |
| SEO, Maintenance & Security Plugins | Plugins section inside the WordPress dashboard | Automate repetitive tasks like backups, database cleanup, image optimization, and security scans, while also running periodic audits of titles, meta tags, and canonical tags in WordPress. |
| WP-CLI and Developer Tools | SSH terminal with WP-CLI and deployment tools | Scriptable, fast maintenance for developers managing multiple or complex sites, including scanning themes for legacy header.php markup and missing rel=canonical tags. |
| Professional WordPress Care Plan | External provider, freelancer, or agency | Hands-off maintenance with proactive monitoring, regular audits, and expert fixes so problems like duplicate titles or broken canonical tags in WordPress are caught early. |
For a broader onpage review after fixing canonical tags in WordPress, follow the steps in How to add keywords in WordPress without hurting and Is WordPress good for seo.
Conclusion You Are Ready to Use the Canonical Tag in WordPress
By now you have learned how to plan canonical URLs, configure a canonical tag in WordPress safely with popular SEO plugins, add them via simple PHP code, and verify that everything works correctly. With a clean canonical setup, search engines know exactly which pages to index and rank, and your link equity is no longer split across duplicate URLs.
Keep your WordPress canonical tag strategy in mind whenever you publish similar content, change URLs, or create category and tag archives. When combined with solid keyword targeting and smart internal linking, canonical tags in WordPress become a powerful part of a healthy SEO foundation.
Further Reading on WordPress Canonical Tags and SEO
- WordPress SEO – Complete Beginner’s Guide
- Is WordPress good for seo
- How to add keywords in WordPress without hurting
- How to add keywords in WordPress without hurting
- How to use ai in WordPress