How to Fix Common WordPress Performance Issues
Expert guidance on matching speed tools to your hosting plan
WordPress performance issues show up as slow pages, random timeouts, and an admin area that feels stuck in molasses. When that happens, you lose visitors, rankings, and revenue long before you notice the problem in your own browser.
This guide walks you through a clear sequence to diagnose and fix common slowdowns. You will start with quick wins, then move into hosting, themes, plugins, database cleanup, and long-term monitoring so your site stays fast instead of sliding back into trouble.
Quick WordPress Performance Fixes That Work
When your site already feels slow, you need quick results before you dig into deeper tweaks. Therefore, start with simple actions that cut load times for most WordPress sites without touching code.
In many cases, you can dramatically speed up a typical site by combining page caching, basic image optimization, and a quick review of heavy plugins. As a result, you often see faster load times within an hour.
Step 1: Run a Real Speed Test
Before you change anything, you need a baseline. However, do not trust only how the site feels on your own device, because your browser cache hides real problems from you.
- Open a speed testing tool in a fresh browser tab, such as PageSpeed Insights.
- Enter your homepage URL and run the test several times.
- Write down key metrics like Largest Contentful Paint, Time to First Byte, and total page size.
- Repeat the test for one or two heavy inner pages, such as a blog post with many images.
Pay attention to patterns across tests rather than chasing a single “perfect” score. This way, you can later confirm that your changes make real, measurable improvements.
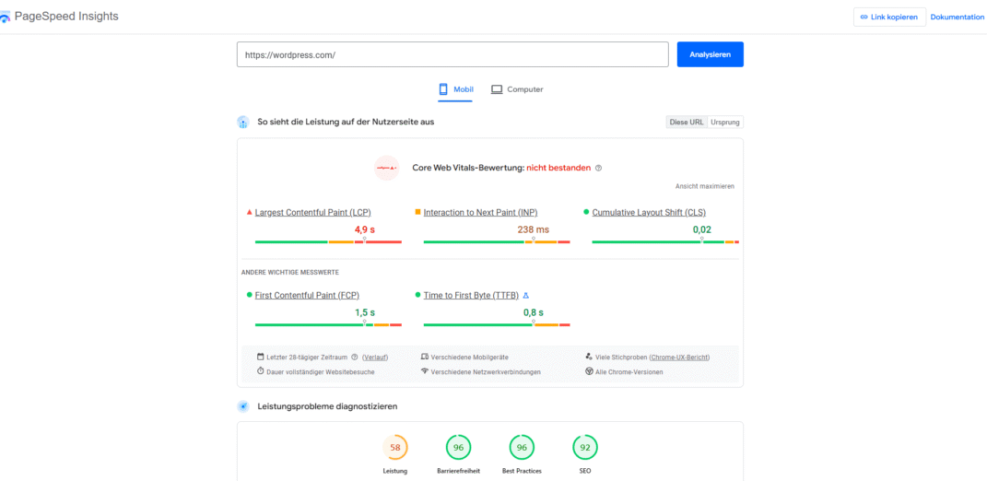
This Google PageSpeed Insights report illustrates critical mobile performance metrics for wordpress.com, indicating a failed Core Web Vitals assessment.
Step 2: Enable Page Caching in Minutes
Page caching is usually the single biggest win for a slow WordPress site. Instead of generating each page from PHP and the database on every request, caching serves a ready-made HTML copy to most visitors.
- Check your host’s control panel to see whether server-level caching is available and switch it on if it is.
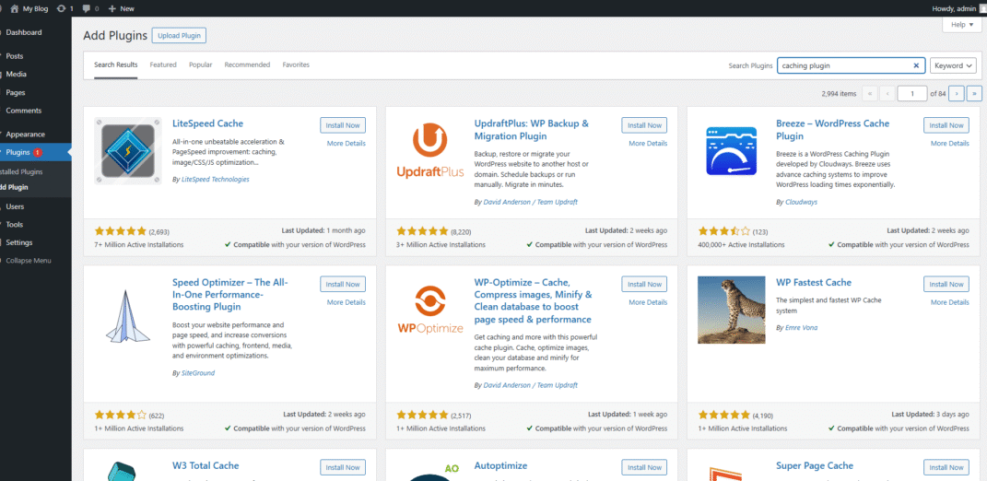
- If not, go to your dashboard and install a reputable caching plugin from the official directory.
- Activate the plugin and start with its default or “recommended” settings.
- Clear the cache, then rerun your speed tests from Step 1:: to compare results.
Navigate to Plugins » Add New and search for a caching tool that has many active installs and good ratings before installing it.
Step 3: Compress and Resize Heavy Images Fast
Images are often the heaviest part of a page. Therefore, even simple image compression can shave seconds off your load time, especially on mobile connections.
- Identify the pages with many large images from your speed test or your own review.
- Install an image optimization plugin that can bulk compress existing images and automatically handle new uploads.
- Configure it to use lossless or “balanced” compression and to create WebP versions where supported.
- Regenerate thumbnails and run bulk optimization, then test the affected pages again.
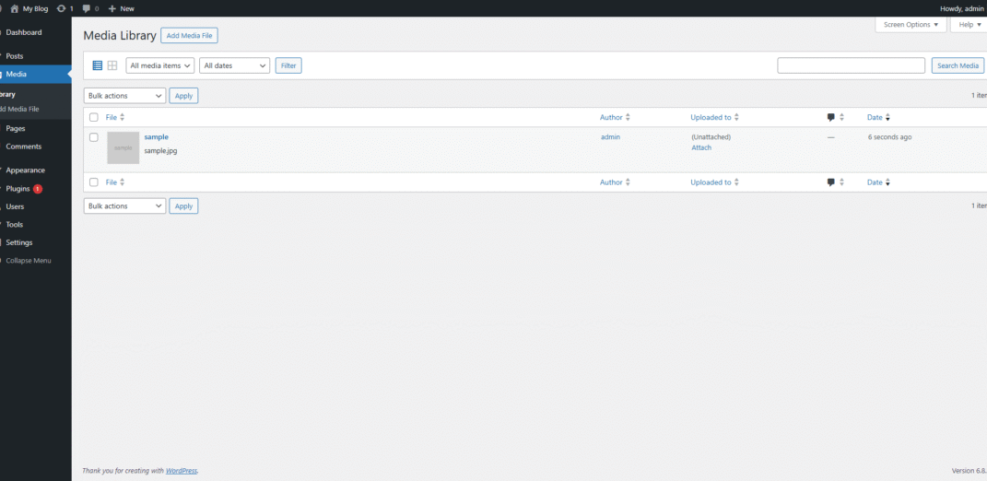
Navigate to Media » Library and switch to list view to quickly spot oversized images and confirm that new uploads use the expected file sizes.
Choose Hosting That Keeps Sites Fast
If your server is underpowered or misconfigured, no plugin will fully fix the problem. In addition, low-quality hosting often shows up as slow Time to First Byte, random 500 errors, or performance that collapses during even small traffic spikes.
Why Is My WordPress Site Suddenly Slow?
A site that was fine yesterday can crawl today because of traffic spikes, a noisy neighbor on shared hosting, a heavy new plugin, or a theme update. Therefore, always review what changed recently, including visitors, plugins, and content, before you assume something is “broken” on the server.
Step 4: Check Server Resources and PHP Version
Your hosting dashboard usually shows current PHP version, resource usage, and sometimes slow log entries. Consequently, you can spot clear bottlenecks without touching code.
- Log in to your hosting control panel and locate the PHP settings area.
- Confirm that your site runs a current, stable PHP version such as 8.x, not an old release.
- Check CPU, RAM, and I/O usage charts around your busiest times.
- Increase memory limits for WordPress if they are very low, then retest.
/* Increase WordPress memory limit for better stability */
define( 'WP_MEMORY_LIMIT', '256M' );
Always test changes on a staging copy when possible so you can roll back safely if anything behaves unexpectedly.
Step 5: Decide When to Upgrade Hosting
Sometimes the real fix is moving up a tier or switching providers. However, you should look for clues before you make a big change.
- Review how often your site hits resource limits or shows 5xx errors in server logs.
- Compare your current plan’s limits to your traffic and installed plugins.
- If you run ecommerce, learning sites, or membership areas, consider managed WordPress hosting with tuned caching.
- Plan a migration window and test everything on the new host before changing DNS.
If performance instantly improves on a better plan with the same site, your old hosting was the bottleneck all along.
Clean Up Themes, Plugins, and Code
Even on a strong server, bloated themes and inefficient plugins can drag WordPress performance down. Therefore, you should treat every extra feature as a cost that must justify the load it adds.
Step 6: Audit Plugins for Performance
It is not the number of plugins that hurts most sites, but a few slow ones that run on every page. Because of that, you need a simple process to spot and remove the worst offenders.
- List all plugins and mark the ones that are not strictly necessary for your site’s goals.
- Temporarily deactivate non-critical plugins in small groups and rerun speed tests after each change.
- Replace slow, all-in-one plugins with lighter tools that do just what you need.
- Remove any plugins you no longer use instead of leaving them deactivated forever.
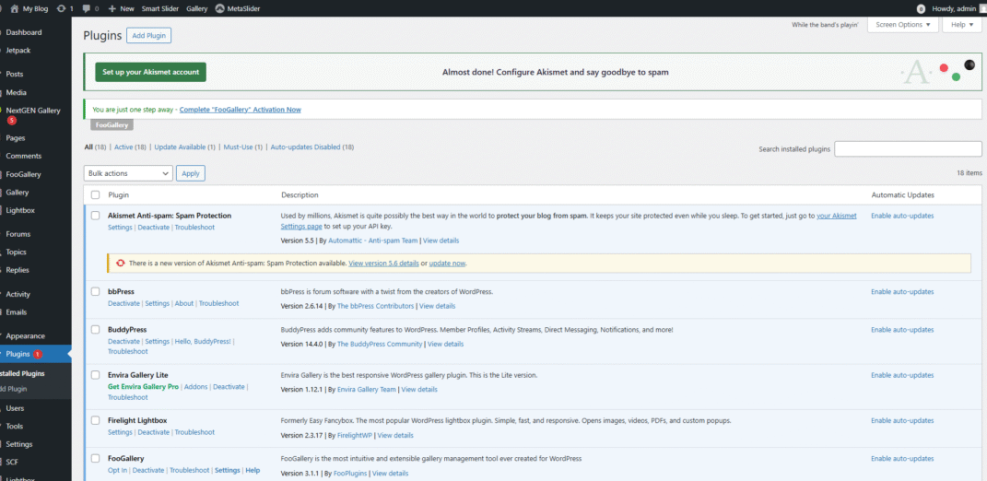
Navigate to Plugins » Installed Plugins and sort by active status so you can quickly spot tools that run on every request.
- Keep only plugins that support clear business goals.
- Avoid overlapping plugins that duplicate the same features.
- Update remaining plugins regularly from trusted developers.
This simple checklist keeps your plugin stack lean so that each remaining plugin earns its place.
How Many Plugins Are Too Many?
There is no magic number of “safe” plugins. Instead, what matters is their quality, how often they run, and whether they overlap in features. A site with thirty well-coded plugins can be faster than a site with five bloated ones that load heavy scripts everywhere.
Step 7: Switch to a Lightweight Theme Safely
Your theme controls much of what loads on the front end. Consequently, a heavy multipurpose theme with dozens of bundled sliders and builders often slows things down more than you realize.
- Create a full backup or staging copy of your site.
- Install a modern, performance-focused theme that supports your layout needs.
- Switch the staging site to the new theme and adjust templates, menus, and widgets.
- Test page speed and layout on desktop and mobile before switching the live site.
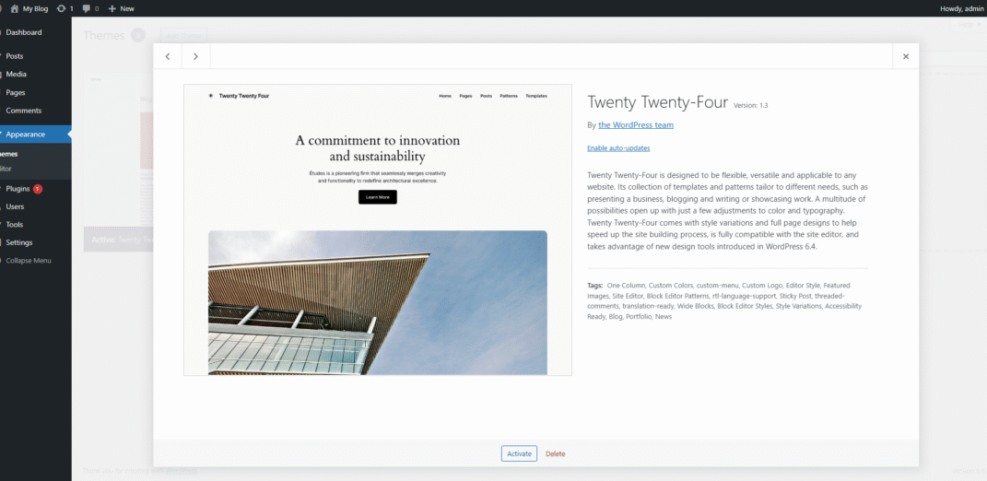
Navigate to Appearance » Themes and click Add New to explore lightweight themes designed with speed in mind.
If the new theme cuts file size and reduces requests while keeping your design, you gain free performance without losing features you actually use.
Optimize Assets, Database, and Caching Rules
Once you fix the big structural issues, you can fine-tune how WordPress loads scripts, styles, and database queries. In addition, careful optimization here often improves both user-facing speed and Core Web Vitals.
Step 8: Improve Compression and Browser Caching
Modern browsers can cache static files for days or weeks, and servers can compress text assets before sending them. Therefore, you should ensure both compression and browser caching headers are in place.
- Check your caching plugin for options that enable GZIP or Brotli compression and browser caching.
- Turn on those options and save settings.
- Use your speed test’s waterfall view to confirm that static files return compressed and cached responses.
- Adjust cache duration for static assets you rarely change, such as logo images and fonts.
These optimizations reduce the amount of data transferred and how often visitors must re-download your site’s assets.
Step 9: Clean Up and Optimize Your Database
Over time, your database collects post revisions, trashed content, spam comments, and expired transients. As a result, queries can become slower than necessary.
- Take a fresh backup of your database before you change anything.
- Install a trusted database optimization plugin that can remove junk safely.
- Configure it to clean revisions, trash, and transients, but leave anything you are unsure about unchecked.
- Schedule regular, automatic cleanups during low-traffic hours.
Database optimization is not about shaving every kilobyte, but about keeping queries simple, predictable, and easy for the server to handle.
Step 1: Limit External Scripts and Embeds
Every external script or embed you add, such as ads, social widgets, or tracking pixels, creates more requests. Therefore, you should keep them to what you truly need and load them wisely.
- List all external services you embed, including fonts, analytics, chat widgets, and ad networks.
- Remove any that no longer drive clear results.
- Configure remaining tools to load asynchronously or after user interaction when possible.
- Lazy load offscreen iframes and videos so they do not block initial rendering.
When you trim unused third-party code, your own assets get more bandwidth and the browser can render visible content much sooner.
Monitor and Maintain Site Performance
Performance is not a one-time project. In fact, every new plugin, feature, or marketing script can undo previous gains. Because of that, you need simple routines that keep WordPress performance healthy over time.
How Often Should You Test Site Speed?
For most business sites, checking performance once a month is a good starting point. In addition, you should test after big changes, such as installing new plugins or changing themes. Frequent checks catch regressions early, when they are still easy to fix.
Step 1: Set Up Regular Performance Monitoring
Automated monitoring tools save you from constantly running manual tests. Consequently, they alert you when something changes instead of relying on complaints from visitors.
- Choose a monitoring service that checks uptime and basic performance from several locations.
- Configure alerts for outages, slow responses, or big shifts in load time.
- Log key site changes, such as plugin installs, so you can correlate them with performance graphs.
- Review reports each month and schedule time for any needed cleanup.
Navigate to Tools » Site Health in your dashboard to review WordPress recommendations and spot potential issues early.

Step 1: Use a Staging Site Before Big Changes
Staging sites are one of the best safeguards for both performance and stability. Therefore, you should treat them as part of your normal workflow instead of a special-occasion tool.
- Ask your host or developer to enable a staging environment for your main site.
- Clone the live site to staging before major updates or redesigns.
- Apply updates, new plugins, and theme changes on staging first.
- Test performance and functionality, then push changes to live only when you are happy.
- Always backup before syncing staging to live.
- Lock search engines out of staging environments.
- Document each deployment so you can trace issues quickly.
This habit prevents many late-night emergencies and keeps your production site fast and stable for real visitors.
WordPress Performance Issues Conclusion
Fixing common WordPress performance problems is less about one magic tweak and more about a repeatable process. When you test first, address hosting, caching, images, plugins, and database in a structured way, you turn performance from a guessing game into a checklist.
Next, create your own short performance routine that you follow each month. Include fresh tests, quick plugin and database reviews, and a review of new scripts. Over time, these small steps keep your site fast, protect your rankings, and make every marketing campaign more effective.
More WordPress Guides You Might Like
If you want to go deeper into specific areas like caching, hosting, and Core Web Vitals, these planned resources will help you build an even stronger performance foundation.
- WordPress speed optimization checklist
- Managed WordPress hosting guide
- How to choose WordPress theme
- Common WordPress backup errors and how to fix
- Beginner guide WordPress speed core web vitals
Use these topics as a roadmap for future improvements, focusing first on areas where your own tests show the biggest gaps.